How to Design Your Social Content for Accessibility

A screenshot of a Tailwind customer video with captions on it on blue background

Inclusivity is an important goal for most companies in 2021, but you wouldn’t know it from their social media content. 

While most social media platforms have tools to improve accessibility, many creators overlook these essential resources. By ignoring accessibility best practices, you may be hampering your reach, going against your company’s values, and missing out on great engagement by not making your content more inclusive.

Lots of people assume that Pinterest, Instagram and Facebook aren’t set up to meet accessibility needs. Think again!

There are plenty of ways to make your content more engaging for those who can’t consume it as easily. These social platforms have committed to making their platforms more inclusive for all people, and it’s a great reason to do the same!

Here’s why accessibility matters in social media, how you can create a more inclusive online community, and tips for creating more accessible content.

[sc name=”mnc-create-visual-cta”]

Why Inclusive Design Matters on Social Media

Almost every social media manager has felt the sting of lower reach after an algorithm change. However, many don’t see how they’re stepping over tons of potential viewers every day with poor design. 

Even with the most beautiful graphics, snappy captions, and on-trend videos, your design might not cater to your whole audience. Without considering people with limited sight, hearing, or reading capabilities, your content may miss the mark. 

Inclusive design ensures that everyone can reasonably engage with your content on social media. Considering that 61 million Americans alone have a disability, you may be accidentally excluding a ton of people from your online communities.

“It’s important to understand that making digital content accessible also means better marketings. As digital marketers, we naturally want to reach as many people as possible, and accessibility helps us do that.”

Alexa Heinrich, Digital Accessibility Expert and Social Media Manager

But designing for accessibility goes far beyond garnering more likes. Including all people in online communities is our social responsibility, and online community builders know how important it is to create a safe and welcoming space for customers and fans. 

As photo and video content expands across platforms, creators need to consider accessibility at every stage of the creation and posting process.

What to Consider When Developing Inclusive Communities Online

Designing for accessibility may take more intentionality than you’re accustomed to. However, a new section on a creative brief or a new box on your checklist can lead to an engaged audience you’ve never encountered before. 

Part of developing an inclusive community on Instagram, Pinterest, or any social network is thinking about how people with different disabilities access your content.

Platforms are beginning to develop equity teams to understand the needs of people with disabilities better, so the tools available to you are constantly changing.

Even so, those tools only help if you empathize with the experience of people with disabilities and understand how the tools work to enhance their experience. 

Content creators should always consider how their followers—including users with hearing and/or vision disabilities—are going to engage with their content, especially visual elements like photos and videos.

If you’re going to post an image, make sure you write alt text for it so anyone using a screen reader can access it. And of course, videos should always be captioned to make them accessible for deaf and hard-of-hearing individuals.”

-Alexa Heinrich

Social media platforms aren’t taking these recommendations lightly. For example, Pinterest took a big step in 2018 when they strengthened screen reader support, improved color contrast sensitivity, and added focus indicators to improve the user experience for those who are visually impaired.

Meanwhile, Facebook and Instagram recently added automatic captioning to video content.

Still, the steps platforms are taking are not enough to absolve businesses from responsibility.

We owe our community great content that they can consume, no matter what tools or resources they use. This is especially crucial on primarily visual platforms like Pinterest and Instagram, where most content still may not be accessible for certain communities.

Creating More Accessible Content on Pinterest and Instagram

Designing content with accessibility in mind may seem complicated at first. However, it’s actually much easier than you think. 

According to Heinrich, there are three key elements to include in every piece of social media content to make it as accessible as possible: a visual component, an audio component, and a readable text component.

You need a visual component for users who rely on their sight to consume content, an audio component for users who rely on their hearing to consume content, and a readable text component such as a written post or tweet, transcript, or image alt text for users who rely on assistive devices to consume content.”

“Readable text can also double as your audio component if a user is having their screen reader read the content aloud to them.

Flattened copy, such as text on an image or open captions on a video component, does not count because a screen reader cannot typically identify it as readable text,” says Heinrich.

Alexa Heinrich

Each component should have substance and tell a story accentuated by, but not dependent on, the other components. 

For example, many professionals use Instagram image alt text in a way that doesn’t support people with disabilities.

Instead of comprehensively describing the image for people using screen readers, some people use alt text as a duplicate image caption or an opportunity to add keywords.

This popular SEO practice can provide a bad experience for people with disabilities who rely on alt text to “see” the images in your social media post or on your website. 

Another example is using emojis in captions. Emojis have alt text connected with them, so a screen reader will relay an emoji as a word that represents the emoji. Thus, having emojis placed unexpectedly between sentences or as a substitute for bullet points can lead to confusion for those who can’t see them.

That doesn’t mean you can’t use emojis in your captions, however. Focus instead on using emojis at the end of sentences, or better yet, at the end of your caption! That way, screen readers still get your message without being stymied by random words like “tree” or “woman in lotus position.”

In cases like these, creating inclusive content involves breaking habits that we may have previously linked to higher engagement.

Three Quick Tips for More Inclusive Content

Creating more accessible content can take some getting used to. Examining your design process and adding new elements for better accessibility may seem daunting, but it can ultimately lead to a stronger online community and more successful social campaigns. 

Here are three easy ways to start designing more impactful, inclusive content today. 

1. Add Captions to Videos

All captions are good captions, right? Not exactly. 

Open captions, or captions embedded in the video file, aren’t as helpful as you may think.

As Heinrich mentioned earlier, these captions often can’t be identified as readable text. Instead, you can add the Caption sticker to your Instagram Stories to auto-caption your videos, or toggle the Auto-Generated Captions setting when you add an IGTV video.

Adding captions supports viewers who are hard-of-hearing while also providing readable text for screen readers. Plus, other viewers might appreciate your captions, too. Facebook reports that 85% of videos are watched on mute, so adding captions can pull in another audience who wouldn’t have heard your videos anyway.

2. Use Hashtags Wisely

As valuable as screen readers are, they can’t always be perfect. With hashtags, adding capitalization can make it easier for screen readers to decipher what a hashtag means. 

When a screen reader sees #tailwindapp, it will likely try to stay the entire hashtag as one word. Capitalization can clarify that the hashtag contains specific words and ensure it is read correctly for the user.

While we’re on the subject, adding 30 hashtags to the bottom of an Instagram caption or multiple in a Pinterest caption can provide a bad experience for vision-impaired users. Add hashtags to a comment, instead.

How to Add Hashtags to First Comment with Tailwind

Posting your Instagram hashtags to the first comment is a powerful tool for accessibility – and happens with just one click with Tailwind’s Instagram scheduling tool!

Here’s how you use it:

  1. Upload your photo or video to drafts
  2. Select the best time to post recommended by Tailwind’s Smart Schedule tool
  3. Write your Instagram caption
  4. Add your hashtags from the suggestions in Hashtag Finder, or add your favorite Hashtag List from saved Hashtag
  5. Check the box for “Post hashtags in first comment” (with Tailwind Auto Post enabled!)
  6. Click Schedule

It’s as easy as that! When it’s time to post, we’ll send your carefully crafted content to your Instagram, automatically populating the hashtags at the end of your caption into your first comment on the post. Presto!

A view of the Tailwind Instagram dashboard, showing the post scheduling recommended times, suggested hashtags for your post, and your caption bar with the Post hashtags in first comment selected.

3. Add Meaningful Text Captions

One word, quippy captions have become normal on Instagram and Pinterest. However, when users can’t clearly see an image, they have no idea what your post is about without meaningful context! 

Expand on the story in your image or video with a detailed, informative caption. While it may not follow the current stylistic trends, it will make a big difference in how people experience your content. Captions can be especially impactful on Instagram Reels, where video trends aren’t always the most inclusive.

For Pinterest, adding relevant information into dedicated fields (like a website address into the URL field) or details in your Pin description can ensure your caption stays easy to read.

Always focus on how content appears on the Pin before repinning other users or brands, and adjust content or formatting to match your accessibility goals. Adding clearly visible text overlays to your Pin with enough contrast to read is a great way to do this.

In fact, you can add clearly readable text overlays and appropriately contrasted color palettes to all your social media designs with Tailwind Create!

[sc name=”mnc-create-visual-cta”]

Putting Inclusivity First in Social Media Communities

As social media managers, we interact with our communities every day. Our brand is so much more than just a company, and interacting with different people is often the best part of the job. That’s why it’s our responsibility to do better and expand our community to welcome everyone. 

Designing with inclusivity in mind may take a few extra steps, but it’s well worth the effort if it means everyone has the opportunity to engage. There are many benefits to accessible design for social media, but the main benefit will always be creating a rich, strong community where no one is left out. 

Do you have any accessibility tips you use for social media? Let us know in the comments!

[sc name=”pin-me-tailwind-create-cta”]

Does your social media pass the accessibility test? Find out how to create user-friendly designs in seconds with our easy guide!

Use Instagram Live to Build Your Brand (Tutorial + Tips!)

A screengrab of an Instagram Live on a phone atop a pink background.

With over one billion users on Instagram, the platform has rolled out a big feature to level the playing field for both big and small creators, and that’s Instagram Live. 

According to Instagram, Lives engagement has increased 70%. Instagram’s surveys have also shown that Lives not only increase visibility and organic engagement, but audiences love them too!

And now, there’s even a way to monetize! Instagram officially allows viewers to purchase a badge during a Live, which will appear on the individual’s photo, allowing their comments to unlock special features. And the money from that purchase goes straight to your account!

Instagram Live is an exceptional way of showing your followers the person behind the camera by establishing authentic trust and a genuine connection with your audience. 

So, is Instagram Live worth it? Absolutely!

In this article, I’ll go over everything you need to know about the benefits of Instagram Live videos and how to pull it off seamlessly. 

So, What is Instagram Live?

Instagram Live is a live video broadcast that allows anyone watching to comment and participate in real-time, showing the face and personality behind the curation. 

When you start an Instagram Live stream, Instagram instantly notifies your followers.

Your Live is then featured at the front of your followers’ Instagram Stories queue.

Talk about standing at the center stage!

In a nutshell, Instagram Live humanizes an account more than any other service and allows your audience to engage with you in a casual setting – which is pretty dang cool!

The Instagram Live notification has its own badge on Stories and appears at the front of the queue

How to Go Live on Instagram in 4 Easy Steps

Okay, let’s say I’ve convinced you to give it a try. Now, let’s get into the logistics of how to use Instagram Live:

Step 1: Open your Instagram Stories camera.

Step 2: Scroll to the “Live” option on the bottom. 


Step 3: Tap the “Record” button to start your Live broadcast. It’s a good idea to give your followers a few minutes to hop on before officially starting.

Step 4: To stop recording, just tap “end” in the top right corner. Once the recording has stopped, you’ll be given the option to download the video onto your device. 

How to go live on your Instagram

How to Watch Instagram Live

Watching an Instagram live is simple and easy. 

When someone you follow goes Live, you can either click directly on Instagram’s notification or open the app and click directly on the Live, which will be at the front of your feed with a colorful ring around it and the word “Live”. 

Instagram also allows Lives to not only be watched on iPhone and Android, but on laptops and desktops through Instagram.com. 

No matter the device, go to your homepage, and you can join by clicking their colorful circled photo to enter the room!

How to Join Instagram Live

Instagram also allows you to have a Live with another account, which can exponentially increase your visibility by broadcasting you to not only your followers but theirs as well! 

And Instagram recently launched Live Rooms, which allows up to 3 featured guests in a Live!

Let’s say you invite someone to join your Instagram Live Stream. Here’s how to add them in real time:

Step 1: Start the Live using the steps mentioned in the previous section.

Step 2: Click Requests and then type the username and hit Send Request, allowing them to join the live stream.

You can also type their username in the search bar and send the invitation that way!

Step 3: And to remove someone from your live video, click the “x” located at the top right of their video, and boom, their video will no longer be broadcasting. 

If an Influencer invites you to co-host their Live, enter the room, hit the down arrow at the top of the screen, and then click Request to Join

Easy peasy, right?

How to Save Instagram Live Videos

Once you’ve ended the Instagram Live, it’ll be saved to your stories for 24 hours, and you can also save it to your camera roll by clicking Download

Keep in mind comments, likes, and the number of viewers won’t appear in the saved video.

Saving the video also allows for your quality content to be repurposed in the future too. 

Here’s a few ideas on how to tastefully reuse your Instagram Live:

  1. You could upload it for IGTV as long as it’s between 1-60 minutes long and keep it on your feed forever!
  2. You can cut your favorite one-minute increments to create Reels. Learn more about creating Instagram Reels!
  3. Take quotes and make them into stylish captivating typography. 
  4. You could cut and trim clips to make a mashup-style video to promote future Lives of your expertise and services.

Related Reading : Did you know creative typography is a Top Instagram Design Trend of 2021?

Instagram Live Settings to Make the Experience Seamless

How to Pin/Feature a Comment 

Pinning comments is a great way to show viewers trickling in what you’re currently talking about, and it encourages others to ask questions and engage.

To pin an individual comment, just tap it and click Pin Comment. When you’re ready to move on, click End in the top right-hand corner of the comment, then click Confirm.

Hiding Lives from Certain Users

Do whatever you need to feel most comfortable during your Live, including hiding it from specific users.

The process is very similar to hiding stories. 

  1. Go to your homepage and swipe right to open your camera.
  2. On the bottom click Live.
  3. Press the Settings button situated on the top left of the screen.
  4. Click Hide Story From and choose the users.
Instagram Live settings - how to hide your Live from certain people

Hiding Chat and Comments on Instagram Live

If the comments are too distracting, you can hide them at any time. Just click the three dots inside the comment box and click Turn Off

You can also opt-out of comments and reactions before going Live.

by accessing the settings (same way as above ^) and clicking Off under the Allow Replies and Reactions option.

Instagram Live settings - turning off comments and reactions

Instagram Live Content Ideas

Whether you’re a pro, or haven’t done one before, here are some ideas for your next Instagram Live!

Go Live with Another Account(s) 

You can invite up to three fellow influencers or brands to join a Live with you and discuss a topic. 

Inviting even one more person puts you front and center to not only your audience members but theirs as well. 

Here’s a tip: Pick influencers with similar niches. And to stay organized, try sending an outline ahead of time so everyone stays on track and gets their guaranteed time to shine!

Host a Tutorial or a Workshop

Whether you’re a beauty influencer, a life coach, or a small business, you can use Instagram Live to showcase your knowledge, personality and answer common Q&As.

Have a Live Giveaway or Make and Announcement

Did you recently reach an exciting milestone, and you want to give back to your growing audience? 

You can hop on live to offer a free gift or service in an Instagram giveaway! Here’s an article on How to Do a Giveaway on Instagram Successfully

Conclusion: How to Use Instagram Live to Your Benefit

Whatever you use Instagram for, Lives are a great way to remind your followers you’re there and a real person. 

It can increase your organic engagement, visibility, and follower count. 

Instagram Lives can even be repurposed and added to your marketing strategy for future use. And most importantly, it can humanize your account and show the amazing, hard working person behind the content.

Meet Tailwind, Your Smart Marketing Assistant!

Tailwind is the social media management tool you need when you don’t have a marketing team! Our Smart Marketing Assistant helps automate your social media designs, scheduling, and analytics with ease, so you can get back to building awesome engagement (and dare I say it, going Live?)

Whether you’re transforming your photos into dozens of personalized designs in seconds with Tailwind Create, or publishing to your top platforms at personalized peak times of engagement with Smart Schedule, Tailwind can help you tackle the toughest parts of social media marketing. 

What are you waiting for? Give it a try today with a free trial of Tailwind for Instagram.

[sc name=”instagram-boilerplate”]

[sc name=”pin-me-tailwind-create-cta”]

Instagram Live is a great way to maximize visibility and organic engagement. Learn how to go Live in easy-to-follow steps and get inspired with ideas!

Why Instagram’s New Anti-Bullying Filter is So Important

Screenshots of Instagrm DM settings for hidden words and hidden messages for antibullying on blue background

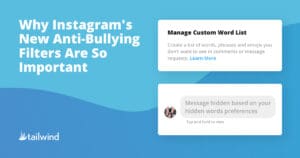
Just a note: This post contains real accounts of bullying, such as body-shaming, sexual harassment, and suicide. If you or someone you know is the victim of bullying, please seek help and additional resources at CyberSmile, StopBullying, or Pacer’s National Bullying Prevention Center.


Having recognition and impact (and big social followings) is what many people strive for, but at what cost is it worth it? 

While having a large social media following has its perks, you may not realize the extent of harassment and bullying you might be subject to as your account grows. 

And, it could negatively affect your mental health. 

That’s not to scare you off of social media forever. After all, influencers, brands, and activists keep showing up to connect, educate, and help people feel less alone.

In fact, I’ve experienced this myself – and people on our team at Tailwind have.

When I became a young mom at age twenty-two and couldn’t afford childcare, I started a blog to create some income and make sense of the craziness in my life. Overall the experience was positive, until I got divorced and became a single woman on Instagram.

As I continued to show up by sharing blurbs of my life and putting my feelings into words, I began experiencing the harassment many social media personalities have shared about.

What had been a safe, creative outlet suddenly became a hotbed of aggressive DMs from men.

After posting about my divorce, I began regularly receiving NSFW pictures, I’ve been asked inappropriate personal questions, and bottom line, I’ve been harassed.

Even though I blocked each account, it seemed every day more would pop up, and at times I’d spiral and blame myself for the harassment.

It’s emotionally and mentally exhausting to be constantly accessible to others at the expense of your vulnerability, and maybe even your career.

My experiences have led me to take long breaks from social media to regroup, which definitely didn’t help my engagement.

Even so, I know what I’ve experienced is minimal compared to many others.

When asking questions about cyberbullying experience for this article, one employee at Tailwind shared that she received DMs from an overwhelming amount of people telling her to “kill herself.” after portrayal in media.

 And she was repeatedly bullied and called terrible names after some fans mistakenly linked her to a publicized love triangle, even though she wasn’t involved. It was a case of wrong place, wrong time – and she bore the brunt of it.

Because desire to be in the public eye is considered optional,  the amount of harassment Creators receive online has been considered an unfortunate disadvantage of a privileged lifestyle… until recently.

Instagram’s New DM Filter to Combat Bullying

In the past, Instagram allowed users to disable messages from unknown accounts and filter/automatically block specific words and phrases in the comments.

Still, there wasn’t an option to filter DMs because of their privacy rules, despite most harassment taking place there.

 And for accounts that receive their income from subscribers and their audience, turning off DMs isn’t an option. That essentially made sifting through awful and degrading messages part of the job. 

Can you even imagine what a mental toll that takes?

“Like text messages, DMs are private conversations where messages go to you personally.

That means we rely on in-app reports and don’t proactively look for hate speech or bullying in DMs the same way that we do in comments or posts.” – Telegraph

This has caused brands and individuals to be subjected to abusive and hateful harassment every single day. Nearly every influencer and celebrity has posted a glimpse of the harassment and hate they receive in their inbox, and it’s truly astounding. 

No one should have to deal with that, especially when they’re just trying to do a job and pave their own way by following their dream.

But now, that’s changing, as Instagram is the first platform that allows you to filter private messages from unknown accounts through individually pre-set words, phrases, and emojis

You just have to tweak the filter settings in the new Hidden Words tab under Settings

This change allows Instagram to uphold its privacy settings while keeping you safe from harmful and abusive comments.

Curious how to enable these settings and make your Instagram experience mentally and emotionally safer? Read on, and I’ll go over what these changes mean and how to implement them!

How DM Filters Make Instagram a Safer Place

Instagram has been working with leading anti-discrimination and anti-bullying organizations to protect users from harassment. Together they’ve made a setlist of words, phrases, and emojis you can enable to block harassment before it even reaches your eyes.

Brands and Influencers noted that private DMs are where they receive the most hate. These proactive actions to balance privacy settings with protection will revolutionarily combat harassment by allowing users to communicate with their followers more healthily and safely.

Once the filters are in place, if you get a message containing one of the flagged indicators, it’ll be sent to a separate Hidden Requests folder where the content will be blurred unless you tap to uncover it. 

Then you’ll be given the option to either reply, delete, or report it to Instagram for further action. 

This much-needed feature will allow your account to act as a filter giving you both safety and privacy from those wishing to disrupt your inner peace.

How to Filter Offensive Comments and DMs

This new feature will roll out to accounts worldwide over the next few weeks, so make sure to update your app so you can use the filters for both comments and DMs in these 4 easy steps.

  • Step 1: Go to your account and click the three horizontal lines button in the top right corner.
  • Step 2: Press Settings
  • Step 3: Click Privacy
  • Step 4: Choose Hidden Words, which will give the option to hide comments and messages with the filters of your choice.

Additional New Safety Measures

In the past, if you reported a comment or DM, the account would be prohibited from sending DMs for a set amount of time. If the harassment continued, the account would get disabled, allowing a single person to harass someone multiple times and even create many separate accounts before they were banned.

To be more proactive in protecting their users, Instagram will now automatically disable accounts that were created to send abusive messages and block preemptive accounts an individual may create to combat repeated harassment.

Conclusion – Hope Moving Forward

“We understand the impact that abusive content – whether it’s racist, sexist, homophobic, or any other kind of abuse – can have on people. Nobody should have to experience that.” – Instagram

While Instagram is a beautiful app to create, educate, and inspire, these new tools should significantly limit the amount of hate and discrimination accounts encounter. 

This feature is the first of its kind, and a huge step toward Instagram becoming a safer space for creators, activists, brands, and individuals. 

I’m curious, do you think these filters will do what they’re meant to and create healthier boundaries between accounts and their audience? Are you happy about the change? Leave a comment below! 

And remember, don’t stop shining your light no matter what someone says to you. You are special and wonderful just the way you are. ✨

[sc name=”pin-me-tailwind-create-cta”]

To protect individuals and accounts from hateful messages, Instagram is rolling out a new filter to hide abusive DMs. Learn how the filter works here!

Using the New Pinterest Analytics for Smarter Marketing

How to use Pinterest Analytics for Smarter Marketing in 2021

As you well know, Pinterest is constantly improving and updating their analytics data. What can we learn from them and how will they inform our Pinterest strategy?

Let’s have a look, shall we? We’ll start off with some of the basics and then move into using analytics to inform our strategy.

[sc name=”CTA – Text – Pinterest Traffic Guide”]

Pinterest Analytics Glossary

An overview of Pinterest analytics, including impressions, saves and outbound clicks

Pinterest Impressions:

What are impressions on Pinterest you ask? Pinterest impressions refer to the amount of times your Pins were seen on any given screen. Impressions are a good indicator of how often your pin topics are being searched, and if your Pins are anywhere within scrolling distance. 

Engagements:

Engagements numbers tell you how many times your Pin was clicked or saved. This can also help you see how often your topics are searched and whether or not your pin drew enough interest for a click or a save.

Tailwind Tip: Use engagement data with your total audience data to get understand your content’s engagement rate. 

Saves:

Saves indicate how often a user saved your Pin to one of their boards. This is likely a higher intent metric, as it’s something the user wants to remember (and possibly buy). It will also come up again and again for them when they go to those boards!

Total Audience:

This metric is easily confused with impressions, but it measures how many unique views your Pin had. That means that it is measuring exactly how many people saw your Pin (not necessarily how many times they saw it). 

While impressions can have one user multiple times, total audience tracks the user only once. 

Outbound Clicks:

This one is self-explanatory, and an excellent indicator of audience intent. Outbound clicks refers to the amount of visits to the linked URL in your Pins (from the Pins themselves of course). 

This is a very important metric in determining how successful your Pins are in your overall sales strategy. 

There is lots more insight to gain from Pinterest analytics, but hopefully these basic definitions can help you as you review your performance metrics.

The New Pinterest Analytics: How It Works

The first thing you’ll notice is the design – clean and simple. It’s a huge improvement over the old dashboard.

By default you’ll see Impressions from all content types during the last 30 days:

  • Pins you saved from your site (“From you” – this includes repins on that Pin)
  • Pins other people saved from your site (“Not from you” – this includes repins on that Pin)
  • Paid and organic
  • Activity from all devices and from all your claimed accounts PLUS activity on Pins you saved which go to other people’s sites.

Whew!

Pinterest analytics gets a big makeover

Now comes the fun part – filtering the data! You can change your date range to show up to 90 days of information.

The first drop-down menu allows you a quick look at trends in:

  • Impressions
  • Engagements
  • Closeups
  • Link Clicks
  • Saves
  • Engagement Rate
  • Closeup Rate
  • Link Click Rate
  • Save Rate

Customize your chart view by using “Split by” to visualize trends broken out by:

  • Content type (Organic or Paid and earned – earned being downstream activity resulting from ads)
  • Claimed accounts (your website, Instagram, other people’s sites, etc.)
  • Device
  • Source (From you or Not from You)

Here are some of the important marketing questions you can answer with the new Pinterest analytics.

Pinterest Analytics FAQ

1. Which of My Pins Generate the Most Pinterest Traffic?

We’ll hop down to “Top Pins” below the graph at the top and change the drop-down menu to “Link clicks.”

Then, set your filters to:

  • “Content Type – Organic” (so your ad data doesn’t skew the results)
  • Claimed Accounts – Your URL

Voila! You’ll see the Pins which are sending the most traffic to your site.

Are they mostly Pins you saved or are they “Not from you” (change the “Split by” dropdown to filter)?

Why does this matter? Understanding what types of content, which image styles, and what subject matter sends the most traffic to your site is crucial in planning your content strategy and informing the design of your Pins.


Related Reading : Pinterest Site Verification – A Step by Step Guide


Sort by Top Pins in Pinterest Analytics
Sort by content types and account in Pinterest analytics

2. Which of My Pins Are the Most Engaging?

Just switch the Top Pins drop down to “engagements.”

You can change the filters on the left to limit results to your own URL and to Pins you saved (“From you”) as well.

Why does this matter? When Pinterest shows your content to your followers first, they’re looking for a reaction. More engagement from your followers = more distribution for your Pin!

Taking a look at what Pinners find engaging can help you determine which topics and even which Pin designs/text on Pin work best for your audience.

Tailwind Tip: Looking at engagement for Pins NOT from your website gives you a look at what is working for your competitors, which might work for you, too! To view those Pins, just change your “Claimed sites” option to “Other Pins.”

If you spend hours and hours designing countless pins, Tailwind Create for Pinterest is for you. It automates the work of creating pins, giving you more time to guide the strategy of your Pinterest channel.

Sort by Top Pin > engagements in pinterest analytics
Sort by Claimed Accounts in Pinterest Analytics

3. How Much Impact Is My Strategy Having on My Pinterest Traffic?

If you’ve ever tried a new Pinning strategy and wondered – “How much is this really working?” now you can know for sure!

Set your date range for just before you started making the changes.

(Note: it can take a while to see an impact, give it at least a couple weeks before you check!)

Then set your filters like this :

Because you want to see all the impact on your traffic you’re looking at Pins you saved (“From you”) and Pins from others (“Not from you”) you’ve selected Source “All.”

But because it’s helpful to see just how much impact your activity has as opposed to that of others, set your “Split by” to “Source.”

Why does this matter? Any strategy you implement is worth measuring!

Do recall though, that Pinterest activity is very seasonal, so compare your overall traffic this period with that last year as opposed to traffic last month or a few months ago.

You’ll need to do that year-over-year traffic comparison in Google analytics for now – the more granular analytics are only available for the past 90 days at this time.

Just go to Acquisition > Social > Network Referrals > Traffic.

4. On Which Devices are People Most Engaged with MY Content?

Change the drop-down menu to “Engagement Rate” or “Link Click Rate” (depending on what you want to track) and Split by “Device”.

Set the filter for Claimed accounts and select your website URL.

Why does this matter? Knowing where your traffic comes from can help you make Pin designs that convert even better.

If most of your engagement is from mobile (as will likely be the case), you know you need to prioritize the legibility of the text on your Pin image and make sure that your landing pages are optimized for mobile viewers.

5. Is My Instagram (or YouTube or Etsy) Content Performing on Pinterest?

Have you claimed your accounts in your profile? When you do, Pinterest learns that you are the creator for the content on those sites, and includes stats on Pins from all those platforms in your analytics.

It can also help you get more followers on Pinterest and those claimed accounts. But, is anyone really seeing that content? Does it make sense to cross post from Instagram to Pinterest?

Now you can easily find out!

Just change your “Claimed accounts” filter option to Instagram and your drop-down menu to whichever metric matters to you!

Why does this matter? Sharing new, fresh content to Pinterest is a great way to increase your exposure and for Pinterest to see you as an active creator.

But you don’t want to be Pinning content that isn’t engaging. Check to see if:

  • It’s worth your time
  • If your content from other accounts is engaging to your audience

Ready for Deeper Insights?

Tailwindapp’s Pinterest Analytics Tools takes your data (and sales to new heights). Tailwind can divide up your data so you can see how each board, keyword, hashtag and source URL performs. 

You can also implement heatmaps, see how your engagement levels progress over time, and even get insight into when your audience is most active.

Ready for that deeper strategy? Give Tailwind’s Pinterest Analytics a try. We’re so sure you’ll love it that we’ve offered the trial for free!

Conclusion: Using the New Pinterest Analytics

Now that we can split out activity from paid and organic, Pins we saved versus Pins others saved, and on and on, we can learn so much which will let us make our Pinterest strategies stronger and more effective over time.

Which burning Pinterest marketing questions will you answer with the new analytics?

Let us know if we missed yours!

Was this helpful to you? Please Pin it for later!

[sc name=”pinterest boilerplate”]

8 Best Design Tools for Creating Stunning Social Media Content

An image of a Pin design in Tailwind Create social media design tool with a text edit box open.

Social media marketing is a great way to promote your brand online. An online presence helps you potentially expose your brand to nearly 4 billion social media users. That’s over half the entire population!

Social media is a big part of an online presence. And one of the most important aspects that you need to take care of while growing your social media following is your content design.

Why is that so?

Most social media platforms are visual-first (like Pinterest, TikTok and Instagram). Some platforms, like Facebook and LinkedIn, aren’t necessarily visual-first. But visuals play a huge part in content strategy and audience interaction.

That’s why nearly 63% of B2C marketers increased their use of images in 2019. And we think they’re on to something!

So in a nutshell, your visuals are important. Whether it’s your video thumbnail on Youtube, an infographic posted to Pinterest, or an image post on Instagram, you need to get your design right for maximum impact.

That’s where social media design tools can help you. These tools can simplify the design process and help you come up with professional-looking designs that your audience will love. We’ve put together our list of the best social media design tools out there to get you started on your way. Let’s take a look! 

Top Social Media Design Tools in 2021

Here are the best social media design tools that you can leverage to take your social campaigns to the next level.

1. Tailwind Create

Tailwind Create is the tool you need when you’re short on time… and design skills!

If you’ve ever stared at your screen for hours trying to think of new post ideas, or been stressed out by starting all your social media designs from scratch – let alone scheduling all of them to your platforms – Tailwind Create is here to help you breathe easy.

[sc name=”mnc-create-visual-cta”]

You can start from almost done with breath-taking designs created for you by our smart designer. All you need are your photos! Tailwind Create instantly transforms your photos into hundreds of optimized designs for Instagram, Facebook, and Pinterest with one click. Just choose from any of the “almost done” designs tailored specifically to your niche or industry!

The best part is, your brand styles (think: color palettes and fonts) are automatically applied to every post to keep your content seamlessly on-brand and matching the look and feel of your brand or business.

2. easelly

Pricing: Free Plan available | Student $2/month | Individual $4/month | Enterprise $5/month |

Platforms: Web

If your target is to create high-quality infographics for your social media audience, easelly should be your go-to design tool. The best part about this tool is that it’s completely free to use to start with  — you don’t even need to create an account to start using it. However, you do have the option to go for its paid plans if you want more features.

Easelly socialmedia design tool

All you’ve got to do is choose from one of the numerous infographic templates on its website and start customizing it to suit your requirements. And the best part is that easelly has a huge library of icons, illustrations, and charts that you can drag and drop onto the infographic design to further customize it.

3. Canva

Pricing: Free Plan available | Pro: $119/annual| Enterprise $30/month pp |

Platforms: Web, MacOS, Windows, iOS, Android

When it comes to social media content design, Canva is one of the best design tools to have in your back pocket. It’s got hundreds of thousands of templates that you can seamlessly edit using the drag and drop editor to come up with stunning designs.

Canva social media design tool

Apart from designing social media images and infographics, you can also create video thumbnails with ease. They already have the dimensions set for you for social media content and give you the flexibility to choose custom dimensions too.

What makes Canva one of the finest designing tools out there is also the fact that you can create social media videos using its editor too. 

You also get access to over 75 million premium photos, videos, and elements when you opt for its paid versions. But even in the free version, you get access to a big percent of them.

4. Adobe Spark

Pricing: Free Plan available | Team: $19.99/month| Enterprise: Custom |

Platforms: Web, iOS, Android

Yet another design tool that can help you take your social media designs to the next level is Adobe Spark. While Photoshop may be meant for professionals who have some level of expertise, Adobe Spark helps non-designers come up with striking content with ease.

This tool offers over 34,000 templates that you can modify to suit your requirements using the simple drag and drop editor. You can also upload your images and icons to further personalize your designs.

What’s more?

Just like Canva, Adobe Spark also simplifies the process of creating videos for your social media accounts. You can add icons, video clips, photos, transitions, and even your voice to develop your videos.

5. Pixlr

Pricing: Free Plan available | Premium: $4.90/month| Creative Pack: $14.99/month |

Platforms: Web, Android, macOS, Windows, iOS

Pixlr is yet another popular photo editor that doubles up as a social media design tool as well. Using this tool, you can seamlessly edit your photos to make them more attractive for your audience.

Pixlr Photo Editor

Whether its collages or removing backgrounds and adding layers, this tool can do pretty much what every professional photo editing tool does. 

It’s also got numerous design templates that you can edit using its drag and drop editor. While this editor may be slightly more complex than that of the other tools, it does offer a wide variety of features so once you’re used to the UI, creating designs will be a breeze.

6. Snappa

Pricing: Free Plan available | Pro: $10/month| Team: $20/ month |

Platforms: Web

No list of social media design tools is complete without the mention of Snappa. This all-in-one design tool helps you create eye-catching graphics for your social media accounts.

Snappa photo editor

Snappa removes the guesswork for dimensions by providing you with the right dimensions for all your social media designs. 

All you’ve got to do is start with one of their templates and choose from over 5 million stock photos. You can then add text, effects, and graphics using its drag and drop editor to make your design more attractive. 

One feature that’s particularly helpful here is its ability to remove backgrounds. Other tools offer similar features too but with Snappa, you can do it with a single click.

However, Snappa doesn’t allow you to edit videos. 

7. Desygner

Pricing: Free Plan available | Pro: $4.95/month| Business: $9.95/ month| Enterprise: Custom Plans|

Platforms: Web, Android, iOS

Desygner has everything that you’d want from a designing tool such as professional templates, royalty-free images, and a drag and drop designer. This ensures that you’ll never run out of images to use. 

Graphic design tools for non-designers

But what makes it really appealing is its automatic resizing feature. With a single click, you can resize your design based on the social media platform that you want to publish it to.

It also takes designing to the next level by letting you upload and edit PDF files as well. This makes it a powerful tool for even B2B businesses that may be looking to upload PDFs on platforms like LinkedIn. 

Be it infographics or video thumbnails, this tool helps you create all the designs you need for social without spending much time.

8. Venngage

Pricing: Free Plan available | Premium: $19/month| Business: $49/ month| Enterprise: Custom Plans|

Platforms: Web

Venngage, like easelly, is a powerful infographic maker that helps you develop colorful and engaging infographics for your social media audience.

Venngage social media infographics tool

It’s got over 7500 pre-made infographic templates that you can load into the editor and then start customizing. 

The drag and drop editor allows you to add photos, icons, and text to the infographic. One of the other features that comes in very handy here too is that of creating and adding charts to the infographic. 

Charts play a major role in infographics and Venngage does extremely well when it comes to them, and this makes the infographics even better.

9. Visme

Pricing: Free Plan available | Standard: $15/month| Business: $29/ month| Enterprise: Custom Plans|

Platforms: Web

If you’re looking for a design tool that can not only help you design infographics but also powerful charts and animations, Visme should be your go-to tool. 

This tool not only lets you create stunning social media posts but also makes it easy for you to develop presentations. 

Its charts feature, in particular, is pretty amazing due to the sheer variety of charts that you can create using it. From simple pie charts and trees to maps, you can work on a whole range of charts on Visme. 

These charts, in turn, can come in very handy for numerous social media posts, especially if you’re into the B2B space.

What’s more?

It’s also possible to create animated social media posts with motion so that you can further catch the attention of social media users.

How a Social Media Design Tool Helps Your Content

Visual content is an important ingredient for the success of your social media strategy. Be it images, infographics, or videos, all your social media posts need to have some sort of visual appeal!

That’s why it’s absolutely critical that you have a good designing tool in your arsenal to amp up your marketing efforts.

All of these tools can help you take your social media game to the next level and most offer free plans for starters as well -including Tailwind! And when you try Tailwind for free, you not only get access to a powerful design tool for all your social media posts, but the ability to schedule, visually plan your feed and craft attention-grabbing captions!

[sc name=”mnc-create-visual-cta-abbreviated”]

Which design tool is your go to? Let us know in the comments below!

[sc name=”pin-me-tailwind-create-cta”]

Looking for the best social media design tools to level up your content? Here's a breakdown of our top 8 picks and how they work for marketers!

8 Social Media Design Mistakes You Could be Making

An example of a photo on a Pin image tht is too small with too much white space, next to a better example.

Social media networks such as Instagram, Pinterest, and Facebook have become a vital part of every marketer’s toolkit. These platforms are fiercely competitive, as every brand, business, and influencer is trying to get their content liked, loved, and shared.

You may be putting in the time, but despite your best intentions, your posts might not be reaching as many people as they could be. 

It’s not all about quantity, as quality is also important. You could be making common design mistakes without even realizing it!

With a few simple changes to the way you post, you could rejuvenate your feed and create more sharable graphics.

Take a look at the 8 most common design mistakes marketers make on social media, and get tips to fix your content!

1. Your Images are Blurry

If your carefully composed images go blurry as soon as you upload them to your favorite social media platform, you are not alone. While this is a common issue that social media account holders have, it can be avoided.

If your image file is too small and has to stretch, this can result in poor image quality and pixelation. And unfortunately, pixellated images tend to make your brand look unprofessional and are much less likely to be shared.

It is always better to upload a larger, high-resolution image than a small one. This is because shrinking is better than stretching!

You should also pay attention to the orientation, dimensions, and file type. Every social media platform has different image requirements so it is a good idea to do your research first.

And important note: PNG or JPEG file formats are usually preferred over GIFs.

Need help with your image sizes? Check out our Instagram Image Size Guide, Facebook Image Size Guide, and Pinterest Image Size Guide to make sure all your posts are exactly the right size!

2. Your Fonts are Hard to Read

It can be tempting to choose the prettiest font in your collection. But pretty isn’t always the best choice for social media. Your followers are browsing quickly, and they want typography that is clear and easy to read. You have limited time to get your message across, so make it count!

Sans- Serif fonts are a group of modern, simplistic-looking fonts that are ideal for digital screens.

Sans-Serif fonts often work well in bold for headings and can be used on social media posts, banners, logos, and stories. Not sure where to start? Try Arial, Verdana, or Helvetica. 

Sans Serif font examples above a Serif font example of Times New Roman.

Tailwind Tip: We are often told that Times New Roman is a safe choice as it comes standard with MS Word. However, it is actually a Serif font and should be used sparingly in digital media.

3. You Are Choosing the Wrong Colors

Color can have an impact on our emotions. This is well-documented in studies about color psychology!

For example, red can be strong and powerful, green can be peaceful, and yellow can be friendly.

The colors you choose in your social media designs should reflect the style of your business. 

While your base colors for your branding should evoke the right feelings, you should also be aware of how they appear on the screen.

For example, a person who owns a coffee shop on a beach might like to use summery colors such as blue and yellow. 

But this could lead to design mistakes. If the yellow is too light, it will be hard to spot on a white background. If the blue is used within the text it could be mistaken for a hyperlink. 

Colors should never be overpowering. If you’re unsure, ask for feedback before posting. 

Ask yourself these questions:

  • Are the colors easy on the eyes?
  • Do the colors work well together?
  • Are the colors consistent with your brand?

Tailwind Tip: Using a colored or black background with white text can cause eye strain. If you still want to use this style, keep your message short.

4. You Are Limiting Your Viewing Options

When posting to social media, you need to know your audience. How are they viewing your content? Your image might look good on a desktop computer but how does it look on a mobile phone?

4.08 billion people access social media on their mobile, so it makes sense to preview your designs on a range of devices. 

Remember, your post might not be a one-size-fits-all that will work on all social media platforms. Your audience may vary and the style of content should be adapted. 

For example, use creative shots on Instagram, choose inspirational photos for Pinterest, focus on your words for Facebook, and be short and sharp for Twitter. You can schedule your content to appear at a time that suits your followers with the Tailwind app.

Tailwind Tip: Adding subtitles to your videos can be worth the effort. You may have followers who are hearing impaired or have their phones on silent. By adding text to your videos you could expand your audience. 

5. You Are Using Stock Photos

Stock photos have their place on the internet. Adding a royalty-free image to a blog post or article is convenient and can complement what you are trying to say.

However, when it comes to social media, authentic, genuine content is the key to success. Your followers want to see the voice behind your brand, and you can do this by taking your own photos

Depending on the size and scale of your business, you may also like to use a professional photographer.

Or, if you’re an influencer or small business, the features found on your smartphone can be enough to get the perfect shot.

This is not to say you can’t ever use stock photos – and stock photo photography has come a long way from the overly posed versions that come to mind – just make sure to include eye-catching images with personality that match your brand!

Tailwind Tip: Not all stock photos are free to use for marketing purposes. You should always check the license before publishing a stock photo on your social media account.

6. You Are Not Customizing Your Designs

Are you showing off your creativity by customizing your digital artwork? If the answer is “no,” we say, “why not?” 

When you sign up forTailwind Create, you don’t have to be an experienced designer to get the look.

Whether it’s Facebook, Pinterest, or Instagram, you can personalize your social posts in an instant. Mix up the colors and add your logo. With minimal effort, your posts will look professional and on-brand.

[sc name=”mnc-create-visual-cta”]

Tailwind Tip: Adding your handle or website to your images can help you get noticed. If your followers choose to reshare your posts, you will get credit as the original creator. 

7. You Are Using Every Inch of Space

Graphic designers understand that less can be more. Negative space is the area that surrounds the objects and text in your images. The background is just as important as your words and imagery!

A common mistake is to fill up the entire graphic with letters and shapes. This can look cluttered and can confuse your followers. Whether it’s a logo, header, or post, try embracing space.

There are brands you may be familiar with that understand the impact a simple background can make. These include FedEx, Google, eBay, and J Crew. Be strategic and try to avoid chaos in your images.

Tailwind Tip: White space can direct the eyes of your audience to important points of your content. Check out our guide to visual hierarchy in graphic design to learn more!

8. You Are Not Using Grids

When we look at writing, we subconsciously expect it to flow in a certain way. Another common social media design mistake is positioning text at random. If you don’t get the spacing and alignment right, it can distract the reader and make your profile page look rushed and messy.

Even if you are intentionally scattering your words to create a unique effect, they still need to be in alignment. When designing your graphics, use the grid function to get your positioning just right. 

Also, be mindful of the hierarchy of your words. The most important part of the message should be the biggest and boldest, and the least important should be the smallest. 

Tailwind Tip: Left and center alignment are preferred by designers. Unless you are printing a newspaper, never use justified text.

Don’t Make These Social Media Mistakes

If you are serious about social media, it’s time to take a look at the way you are designing your content. There are a number of mistakes you could be making but the good news is, they are easy to fix!

We looked at eight different social media design issues, including blurry images, fonts that are hard to read, the wrong colors, limited viewing options, stock photos, generic graphics, not enough negative space, and misaligned text. And, we gave you a few top tips on how to get your designs just right.

When you take your time and plan and customize your graphics to suit your preferred social media platform, the results will be well worth it. Once you find a style and color scheme that suits your brand, stick with it.

Remember, you don’t have to do it alone because Tailwind makes the process simple. With this clever app, you can design branded social media posts (no design experience required), schedule your content, and find relevant hashtags!

Get the support you need to manage and create dazzling posts for your social media accounts with a free trial of Tailwind!

[sc name=”pin-me-tailwind-create-cta”]

Are you making any of these common social media design mistakes? Find out what to look for to improve your social media posts and boost your followers!

Facebook Content Strategy: Top Tips for Winning the Game

An image of a woman making notes in a pink notebook on a table over a pink background

Ever heard that old saying, ‘Fail to plan, plan to fail?’ In business, life, and yes, even with Facebook marketing, it’s the raw and honest truth. You really can’t hit a target if you never know what the target is. The caveat is that you won’t know what the target is if you don’t make a plan!

Really, why waste energy and resources doing anything of importance without a solid plan in place? There’s no rhyme or reason to such tom-foolery, in our humble opinion. 

But, where to begin? We know that designing a killer Facebook content strategy can feel overwhelming, but it certainly doesn’t have to be. We decided to curate some of our top tips for those of you that are in it to win it! 

Hit one tip out of the park or hit them all, and you’ll at least be a step closer to becoming that content strategy beast we know is hidden inside of you! 

1. Determine Your Audience

Facebook audience insights dash

The first step in any branding and content campaign is to determine your target audience. Once you know that target, you can find ways to reach hit it effectively, nearly every time.

Engage with Your Audience 

Once you know who your ‘right people’ are, make sure to engage with them.

This can be done by replying to comments and mentions, or engaging them through posts that require them to give an opinion about something!

Engaging your audience on Facebook also includes making quality, relatable content they will take an interest in. Be sure to add a personal touch to your posts and mention the commenters’ names when making replies, so that your people feel seen and heard.

Grab Their Attention

Creating content that’s related to your brand, and then presenting it in an attractive and engaging probably should be labeled ‘Attention Garnering 101′.

You can also increase attention by incorporating current trends and events into your content strategy. Just be sure they are trends and events that hit home with your target demographic.

Most people typically don’t care about something happening 2,000 miles away in another state. Also, there’s really something to be said about not over-complicating things, including your content. Sometimes, simple is best.

Don’t Oversell Yourself

Yes, the whole purpose of promoting your business or brand on Facebook or any other social media platform is to increase exposure, which hopefully then translates into sales. However, you don’t have to be annoying about it! 

If all of your posts end with the phrase ‘order now’, hate to break it to you, but you’re probably overselling.

Try a more subtle and refined approach and let your sales happen organically. When people are interested in your content and brand, they will eventually invest in your products and services. No need to be that smarmy sales guy or gal whose every post is riddled with ‘buy this’ or ‘order that’.

2. Set Those Goals!

In order to develop a marketing strategy that maximizes your exposure on Facebook, its imperative to set your goals.

Below are some common questions to help you determine what your goals might look like. Answering these questions can set some parameters for you to measure your progress against.

What Do You Want to Achieve Through Facebook? 

Facebook is arguably one of the most popular platforms to post content and promote your brand or business. But you have to know what you want from it in order to learn how to use it as an effective tool in your content marketing strategies. Related questions to ask include:

  • What do you want to achieve through Facebook content creation? 
  • How many followers do you hope to gain? 
  • Is that number achievable? 
  • What’s the time frame you’re working with?
  • Are you willing to spend money to meet your goals? 
  • If so, how much?
  • What other resources and manpower do you have to reach your goals?  
  • Are you creating posts simply to spread information? 
  • Or are you attempting earn money through your content?

What Do You Want to Achieve Through Branding?

Depending on your business model, your branding and content strategy may look different from another business, even within the same industry. Related questions you might ask yourself include:

  • Is the goal to increase exposure and awareness of you brand? 
  • Do you simply want to sell products or services? 
  • How aggressive in your branding and promotion are you willing to be? 
  • Do you have a minimum profit margin to dub a campaign as successful? 

What is Your Overall Company Goal? 

Finally, and possibly most  importantly, in order to define any micro goals, you need to know your company’s overall goal. All of your Facebook content, marketing, and branding strategies should point to the main goal, even if the finger is subtle. 

This could be a financial goal, an expansion plan, an exposure goal, or it could even be related to a very personal ‘company mission.’ Whatever it is, try to tailor your Facebook content strategy to lead you to achieving it, and always remember to ‘keep the main thing, the main thing.’  

3. Use Your Time, Manpower, & Resources Wisely

Regardless of how big or small your brand or company is, whether it’s newly established or has been around for decades, any and all resources you have at your disposal are ultimately finite.

Therefore, it is imperative to maximize those resources and use them where they are most effective. 

Monitor Your Time

Facebook can be like that proverbial rabbit hole that warps all sense of time. It’s important to monitor your time carefully. Keep browsing related pages and blogs on Facebook––cleverly disguised as ‘keeping an eye on the competition’––to the minimum you can realistically get away with and still know what they’re up to. 

Focus the bulk of your time researching and gathering information for your own content, creating said content, posting said content, and then engaging with your followers on that content through comments and messages. Your most valuable time spent is that which is spent creating your own stuff.

Be Realistic About Your Abilities

It’s always best to be honest about the manpower you can dedicate to content strategies and social media marketing. Whether you’re managing your campaigns yourself or have dedicated staff for that kind of thing, you have to divvy up duties in a way that works. Don’t overload yourself or your people, because what you produce will only suffer in quality as a result. 

Use the Best Tools You Can Find

Facebook has a wide range of tools that let you keep an eye on your post insights, giving valuable intel about your demographic and the likes and dislikes of your audience. 

You can even schedule posts on Facebook to avoid daily disruptions to post them manually. This can be especially helpful if your target audience is active during odd times, like the wee hours of the morning. The takeaway is to find the best tools and software available to you, in order to make your job as easy and as straightforward as possible. 

4. Manage Your Finances Carefully 

Like any other resource, your financial budget may have limits or constraints. However, you’ll want to set aside at least a little something to get your feet wet with Facebook’s paid advertising options. Those options include:

Facebook Ads 

The first and most commonly used way to advertise on Facebook is with their ad platform. In a nutshell, you pay Facebook a set amount of money every day to target a set number of people, of a specific age group and locality, among other parameters.

You choose the type of targeting that works best for your business and market. Facebook ads can help increase sales and/or contribute to the growth of your brand!

Facebook ad from Fashion Guru

Related Reading : Facebook Ads Design Tips Every Marketers Should Know


Boosted Posts

Another option is to boost your posts. Just make sure they are stellar posts! Boosting a post increases your exposure by getting shown to people who don’t follow you, but may follow similar pages. 

The method of using this service is much like using Facebook ads, with similar targeting options. Try boosting an already high-performing post. It’s already proven itself organically, so boosting it could amplify its power even more.

Partnerships 

Some brands increase their page reach by partnering up with other brands or businesses in their area. This incentivizes those brands to give a shout out to yours. In exchange, you might offer them financial compensation, access to free products, or a promise to cross-promote their page too. Just make sure they are complementary businesses and not competing ones! 

5. Determine Your Branding Style 

Although it’s important to adjust your content according to your target audience, its also important not to stray too far from your brand messaging.

Post Brand-Specific Content 

Many of the people that see your content on Facebook will not end up buying your products. However, for those that will, you need to make sure you post content that authentically reflects your brand. On-brand content will attract your right people who are truly interested in your products or services. 

Fan-Centric Content 

Always remember that to keep your page’s engagement up and increase the reach and exposure of your page and posts, it’s a good idea to post fan-centric content once in a while. This is the content that’s both fun and engaging for your audience, with little to no focus on ‘selling.’

6. Create a Content Schedule

Remember, successful strategies on Facebook are consistent strategies. Knowing what to post and when does require some elbow grease, but once you have that ‘what’ hammered out, you can focus on the ‘when.’ Why not start with making a simple schedule? The reality is that schedules make life easier and help to keep you organized, even if they aren’t exactly sexy! 

Schedule Your Content Creation

Content creation is no easy task. From curating or capturing images to make your post more attractive, to finding the right words for that blog post, to shooting a video or captioning it for better engagement, content creation is a time-consuming activity. It requires your full creative juices. 

That means you need to schedule your content creation activities during your most productive hours, and leave everything else for after it’s done. Maybe your best times are early morning, maybe they are late at night. There’s no wrong time, only the right time for you.

[sc name=”mnc-create-visual-cta-abbreviated”]

Schedule Your Content Posting

Before scheduling your content, use your ‘Insights’ tool on Facebook to figure out what times your target audience is most active online and when they are most engaged with your posts. 

Once you pinpoint that time range, schedule out your content to publish during those times––using those handy tools we know you’ve found by now––and create a weekly post schedule. You can create content well in advance and set it up to go out once or twice a week, like clockwork, no extra brain power on your part. 

If we had to boil down a winning Facebook content strategy into three, itty bitty words, they would be:

Quality, targeted, and consistent!

What’s included in your Facebook content strategy? Tell us below!

Creating a Facebook content strategy can help you streamline your messaging and interaction on the platform. Check out our tips for making a winning plan!