
Marketing
The Ultimate Guide to Invoicing for Influencers and Content Creators
You just wrapped everything up with your latest brand partnership (congrats!). The content is approved and it’s in Tailwind’s Instagram scheduling tool, ready to go
You just wrapped everything up with your latest brand partnership (congrats!). The content is approved and it’s in Tailwind’s Instagram scheduling tool, ready to go

Want to skyrocket your Instagram engagement? Learn how to increase likes, comments, and shares on your posts with these proven techniques for 2021. Incorporate the latest data on hashtags, Reels, Stories, and more to connect with your audience and build a loyal following.

Discover the power of using Facebook Stories for your business in this comprehensive guide. Drive traffic, engage customers, and increase sales with expert tips and best practices. Don’t miss out on this opportunity to stand out on social media!

Discover the benefits of using Facebook Groups for your business and how to effectively incorporate them into your marketing funnel in 2021. Learn the best practices for building community, using essential features, and growing your business. Join the conversation and expand your reach with this in-depth guide.

Drive sales and build trust with your online customers by following these 10 essential tips for creating visually compelling content. From consistency to engaging the senses, this guide covers it all. Start optimizing your ecommerce content for maximum effectiveness now.

Did you know that since the pandemic began earlier this year, Pinterest has grown its monthly active users from 335 million to over 420 million?

Learn how to increase Instagram engagement with video marketing techniques and create a strong brand identity. Plus, find out how Lumen5 can help you create thumb-stopping social media videos in minutes. Sign up now!

Discover eight effective ways to increase customer engagement and drive revenue on Instagram. From unique content to hashtags and contests, learn how to optimize your strategy for success. Try it now with a free trial of Tailwind for Instagram!
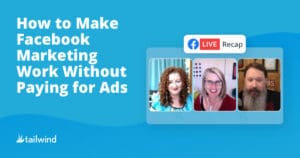
Learn from the self-professed queen of trial and error, Holly Homer, on how to succeed at organic Facebook marketing. Discover insights, tools, and tips for creating quality content that engages and converts. Don’t miss this episode of Marketing Unleashed.

Learn how to improve your product photography and drive sales for your ecommerce business with these essential tips. From lighting and backdrops to angles and editing, this blog covers everything you need to know. And as you keep learning and refining your skills, your sales will continue to grow!
Start with a forever-free plan. No credit card required.

