How to Write the Best Pinterest Descriptions and Titles: Boards & Pins!

If you’re wondering about Pinterest SEO best practices, and how to write the best Pinterest descriptions and titles for Boards & Pins, we’ve got you covered!

There is an art and a science to it., just like with everything else on Pinterest, and we have it down.

When you get the art right, you’re appealing to a reader’s emotions, challenges, and desires for the future.

When you master the science, your Pinterest SEO will improve. That leads to more and more distribution and website traffic.

I’d call that a win-win!

In this blog post, we’re breaking down how to write Pinterest descriptions and titles for Pins and Boards. Plus we’re talking about why they’re so important for engagement, traffic, and the Pinterest search engine!

Pinterest Descriptions and Titles: What They Are, and Why They Matter

Simply put, Pinterest descriptions and titles give more context for your Boards and Pins, they are the first contact between your Pin and the audience. They give Pinterest users a clue as to what kind of content they’ll find Pinned to your Boards, or what your Pin is about!

The importance of Pinterest descriptions and titles

Good Pinterest descriptions and titles drive engagement, traffic, and reach.

In 2018, Pinterest created a study of 21,000 Pins, where they analyzed Pin designs and captions, and what they found will amaze you! Here are just a few highlights:

  • Including your business name in the first sentence of the caption leads to a 54% higher conversion rate for email signups
  • Using clear, actionable wording and a strong call to action increases email signups 70% and online sales by 6%.
  • Adding a price increased sales by 28%.

Clearly, descriptions matter to people on Pinterest. And, as it turns out, they matter to the Pinterest algorithm too!

To further support these results, in a 2020 webinar with Pinterest’s Current Partnerships Manager, Lucy Matthews, we asked her about the possibility of using the same title and description for several Pins at once. Not only was her response categorical, but her explanation made all these concepts much clearer.

When you’re creating titles and want to use the best title and description for a Pin, both should reflect information about the Pin and what can be expected when clicking through.

Titles that don’t accurately reflect an image or a landing page are already less valuable to Pinners and will not perform as well.

-Lucy Matthews

Pin descriptions are absolutely vital to Pin distribution. By including relevant keywords (that relate to the page you’re linking) in your Pinterest Pin description, Board title, and description where the Pin is saved, you send a signal to Pinterest about your content (think: Pinterest SEO!)

These keyword signals in your Pin title, Pin description, Board Title, and Board Description help Pinterest surface your Pin to the right people and in the right search results.

As with Google, don’t use random unrelated keywords, only relevant keywords. You want to avoid being reported for spam on Pinterest!

What do the Pinterest captions and titles look like?

A Pinterest Pin and a Pinterest board with the title and description areas circled

Pinterest Pin descriptions display in slightly different spots, depending on whether you’re using Pinterest on a desktop or the mobile app.

On a desktop, your Pin description will appear to the right of your Pin image and under your Pin title when selected. On Pinterest mobile, the description appears underneath the Pin image, just after your Pin Title.

Pinterest Board descriptions appear at the top of your Pinterest Board, just under your profile picture. This space helps clue your followers into the contents of your Board, and what type of Pins you’ll be adding to it! 

Now that you know where to find these descriptions, and what they’re supposed to do – let’s talk about why writing great Pinterest descriptions is so important.

Troubleshoot: Why Are My Pinterest Descriptions Missing?

If Pinterest Pin descriptions matter so much – you may be wondering – why are they missing half the time? Sometimes you see them on mobile, but not on desktop. Or you might see them on some Pins and not on others. If you manage several accounts for clients, you may see them on some and not others.

It’s actually not uncommon. Here’s what Pinterest has to say:

“Your descriptions might look different across Pin formats and devices. Sometimes people will see the full description in their feed, and sometimes they’ll only see the Pin title or a few words of the description.

No matter what shows in people’s feeds, know that your description is working hard behind the scenes to get your content in front of the right people.”


How to Write Great Pinterest Pin Descriptions and Titles

Now let’s talk about Pinterest description and title best practices, and how to write them for your Pins!

Whether you add a Pin directly to Pinterest or are scheduling a Pin with Tailwind, you’ll see a box for a Pin description.

A side by side view of the module for building a Pin in Pinterest versus building a Pin in Tailwind
  • On Pinterest, it’s the “Tell everyone what your Pin is about” field, to the right of the Pin image field.
  • On Tailwind, it’s the “Enter a brief caption” field to the right of your Pin image.

Not yet using Tailwind for Pinterest? [sc name=”Pinterest Signup – Text Link”] and save hours each week on your Pinterest marketing strategy!

As for what to write in your Pin description, you’ll want to include anything that might help people decide if your Pin is relevant to them. The more details the better. Imagine you had 10 seconds to tell someone what your linked page was about. What would you say?

Your Pin Description Should Include:

  • Relevant keywords near the beginning of the description
  • Brand name in the first line of your description
  • Natural sentence structure (no keyword stuffing!)
  • A call to action – tell people what you want them to do when they visit the page.
  • As many enticing details as you can include!

Need some help with Pin Descriptions? Try Tailwind Ghostwriter!

Let’s be honest – writing perfect Pin descriptions for all your Pins that include the elements above can be a little…daunting. In fact, our members said it was more than daunting – they confessed they actively avoided it!

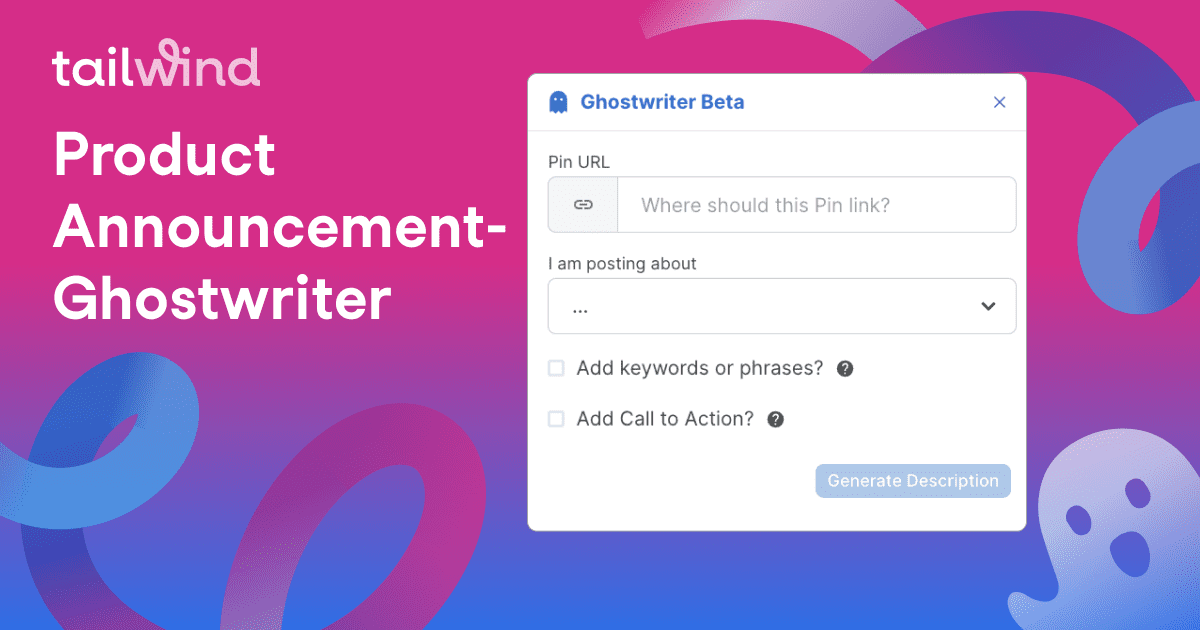
Don’t worry. We have a brand new Pinterest description generator tool that can help. Meet Ghostwriter!

Ghostwriter is a powerful AI tool that can create natural-sounding Pin descriptions in record time. Simply upload your Pin image (or schedule from Tailwind Create), click the “Ghostwrite For Me” button on your Pin details screen, and input your information.

Ghostwriter will ask you for:

  • Your Pin URL
  • What kind of content this is (think: promotional, informational, lifestyle, etc.)
  • Your Pin title
  • Important keywords and phrases you want to be included in your description
  • Your call to action

Then, in the time it takes you to sigh over the prospect of saying the same old thing in another way, Ghostwriter will generate 3 possible Pin descriptions for you.

You can make a few tweaks, have Ghostwriter try again, or save your brand new Pin description as is! It couldn’t be easier, and our members love it!

Tailwind ghostwriter preview, with a Pin, the Ghostwriter beta screen with inputs, and an auto-generated caption.

In fact, 100% of the testers in our beta group said they were likely to continue using Ghostwriter again. . Want to try it for yourself? Ghostwriter is available on all Tailwind plans, including our forever-free plan!

How Long Should My Pin Description Be?

You have up to 500 characters for your Pin description. That’s plenty of space for the natural use of keywords, including a CTA, and all the information people need to know about what your Pin and the linked content can do for them.

When your caption appears in the feed, it’s the first 30-60 characters that are most likely to appear. Put the most important, most compelling parts first.

The Fundamentals of Pinterest Title Ideas

Similar to descriptions, Pinterest titles play a crucial role in engaging your audience. Since the title and the art may be the first things your audience notices about your Pin, we could even argue that they are more important to your CTR and traffic. Let’s examine the characteristics of a winning Pinterest title idea.

  • An appealing Board and Pin title might be the difference between someone pausing and clicking or simply scrolling when it comes to standing out among the vast amount of content that Pinterest offers.
  • Its length is limited to 100 characters. Remember that it will appear above the description, with the first 30-35 characters. For this reason, you should place your important keywords as close to the beginning of the Pin title as you can.
  • Add adjectives
  • You may use at least one long-tail keyword in your Pin title. But please, avoid keyword stuffing.
  • Use headline case rather than sentence case

Pinterest Pin Description Template + Examples

Understanding the elements of a strong Pin description is nice, but how does that translate to creating an effective caption?

A simple way to think about crafting your Pin description is with this template:

[Address Search Intent with Keywords] + [Brand Name] + [What You Offer] + [Relevant Details] + [CTA]

Let’s look at a few Pin examples – one for each of the four objectives: awareness, email signups, online sales, and offline sales.

Pin Descriptions Example: For Increasing Brand Awareness

Here, we’re TravelBali, a vacation resort :

Looking for an all-inclusive, family-friendly vacation holiday? TravelBali has easy packages and financing to help you plan your dream trip. Swim with stingrays, relax on a catamaran, and end your day lounging by one of our four giant pools with swim-up bars!

Kids stay and play for free. If adventure holidays are your thing, we have that – rock climbing, cave diving, hang gliding… Or if you prefer a relaxing holiday, enjoy our spa with massage, sauna, mud bath, and facials – and of course, the beach with crystal waters and sand for miles! Choose your dates now.

The keyword usage here is strong.

Great for attracting Pinners who are just starting to plan out a vacation. Notice that the brand name is near the beginning, and how compelling the copy is. I’m ready to pack my bags!

Pin Descriptions Example: To Grow Your Email List

Now we’re home decor business :

For luxury linens at discount prices, think Adlers! From gauzy, no-iron summer curtains to luxurious holiday linens for the most decadent of family gatherings, we have everything you need at prices up to 80% off every day.

Be the first to hear about new styles and price cuts when you sign up for our email list.

Again, keywords to attract people who might be interested in THIS particular content. There’s also a strong call to action and an enticing promise of up to 80%. Who would want to miss that?!

Pin Descriptions Example: For More Online Sales

Now we’re an athletic shoe company ‍♀️:

Perfect for back-to-school, running a marathon, or running errands in style – Maple has the name-brand sneakers you want at the prices you need. We have shoes for men, women, and kids at prices starting at just $19.99.

Trendy and supportive, all our trainers offer arch support, breathable linings, and the latest colors. Plus, we offer free recycling of your old shoes! Find your style now.

Adding in mention of a price, plus spelling out exactly what you offer make this a strong caption. Including your differentiator (free recycling) can also make you stand out in a sea of sameness.

Pin Descriptions Example: For More Offline Sales

And finally, we’re a skincare company :

Summer sun left your skin in need of rescue? Check out our top 5 picks for affordable facial skincare products to rehydrate, fade discolorations, and leave all signs of summer skin damage behind!

Strong keywords here, and a quick, to-the-point statement of what you’ll read if you click. You don’t have to use all 500 characters to say it all!

If, like me, you find you sometimes need a refresher, why not download our Pinterest Toolkit now? It includes all of these examples, plus lots more great resources to help you make your best Pins on Pinterest ever!


How to Write Pinterest Board Descriptions

Now that you’ve mastered Pinterest Pin descriptions, your Pinterest Board descriptions will be a breeze!

  • Like Pin descriptions, you have up to 500 characters available in Board descriptions.
  • To add a Pinterest Board description, go to the Board you’d like to describe and click the Edit button (pencil icon).
  • Then, add your Board description in the section that says “What’s your board about?”

Your Board Description Should Include:

  • Relevant keywords near the beginning of the description
  • A clear explanation of what topics your Board covers
  • Who the Board serves best/ What pain point the Board will solve
  • A mix of niche, broad, and long-tail keywords and phrases ( “how to do XXXX”) that Pinterest users search for.

Pinterest Board Description Templates

Stuck on how to write a Pinterest Board description? Here are some helpful templates to follow:

[Main Keywords] + [Why You Should Care] + [What You’ll Learn (long-tail keywords and search phrases)]
[Core Topics] + [Ideal Audience] + [to Perform (long-tail keywords and search phrases)]

Now That You’re a Pinterest Description Master…

If you remember nothing else about writing the best Pinterest descriptions, remember that:

  • Descriptions matter – both for people and for discoverability.
  • Keywords matter – use them wisely.
  • The more specific you can be in your descriptions, the better.
  • Even if YOU don’t see them, Pinterest does, and they’re used for helping people find your content.

And make sure you grab our Pinterest toolkit. When you put compelling images and powerful descriptions, you’re going to see your reach, engagement, and traffic reach new heights.

Create. Schedule. Publish. All in One Place.

Start a forever free plan of Tailwind for Pinterest!

The best part is, you don’t need to slap down a credit card. All of these features and more are available on our forever-free plan!

Tailwind can help take those time-consuming marketing tasks off your plate so you can put your focus to better uses for your business. You just leave the scheduling, posting, and creating to us.


FAQs

Is it better to use hashtags or keywords in Pin descriptions?

In the ever-changing world of social media algorithms, it can be difficult to keep up with the newest and most effective practices. And when you operate a business it’s crucial to reach the masses. So, you might be thinking, “If I Pin It, They Will Come.” But, sadly it’s not that easy! Luckily, we are here to help. 

Creating beautiful Pins is only part of the equation on Pinterest. You’ll also need an eye-catching title and an engaging and informative Pin description. That’s the bare minimum, but there are also some tactics you can use to elevate your chances of your Pins getting seen – including keywords. 

So, is it better to use hashtags or keywords in Pin descriptions?

Here’s the short of it – keywords are better on Pinterest, and hashtags are best on Instagram. 

Why? You see, Pinterest isn’t a social media “platform,” it’s a search engine. Even though Pinterest did try to incorporate hashtags into their algorithm, they simply didn’t work. Users don’t use hashtags in the search bar so there’s no point to include them in your description. You’re much better using those characters for keywords instead. 

What is the difference between a Pinterest Pin description and title?

Great question! The Pin description is the “caption” or description for a Pin post. 

And the Pin title lives above the Pin description in a larger bolder font. The title is shorter than the description as it explains what the post is. 

In contrast to the title, the Pin description goes into more detail. A Pin description usually focuses on the who, what, where, when, and why of the post. 

It also pulls the reader’s interest further into the Pin and is a great place to put a call-to-action to click through a link or save the Pin!

How do I find my board description on Pinterest?

Creating Pinterest boards is essential for organizing your Pinterest Pins. Pinterest descriptions provide Pinterest users an idea of the type of content that will be pinned to your boards or what your Pin is about.

Make sure to add your Pinterest board description as you create the board. But, if you forget or don’t have time you can always add it later. 


To find your board description on Pinterest, follow these steps. 

  1. Login Into Pinterest
  2. Click On Your Profile Picture In The Top Right
  3. Click Your Board To Open It
  4. Next, Click On The 3 Dots Next To The Board Name
  5. Select Edit Board
  6. Make Your Changes
  7. Click Done

How do I find my Pin descriptions on Pinterest?

Captions on your Pinterest Pins are what connect your Pin with the users. So, it’s essential to create quality ones. Pinterest Pin descriptions are found in slightly different spots, depending on if you’re using Pinterest on the mobile app or desktop.

On a desktop computer, Pin descriptions will appear next to your Pin image on the right. 

On the Pinterest mobile app, the Pin description will appear below the Pin image, just below your Pin Title.

A description link in Pinterest is a live link that is placed inside a Pin’s caption!

Adding a link in the description to a Pin is a great strategy for getting more Pinterest followers to engage with your content outside of Pinterest. This approach can lead to more traffic wherever you link to. 

It’s also important to make sure you include a call-to-action to incentivize followers to click through. 

It’s most optimal if you create Pins that relate to your outbound link so that the traffic doesn’t go to waste. 

Was this helpful? Pin it for later!

[sc name=”pinterest-boilerplate”]

How to Post Seamless Instagram Carousels with Tailwind to Boost Engagement

It’s finally here! 

If you’ve been looking for a seamless Instagram carousel app that will allow you to pre-plan and share photos in ‘Multiple Image’ posts on Instagram, your search is over! 

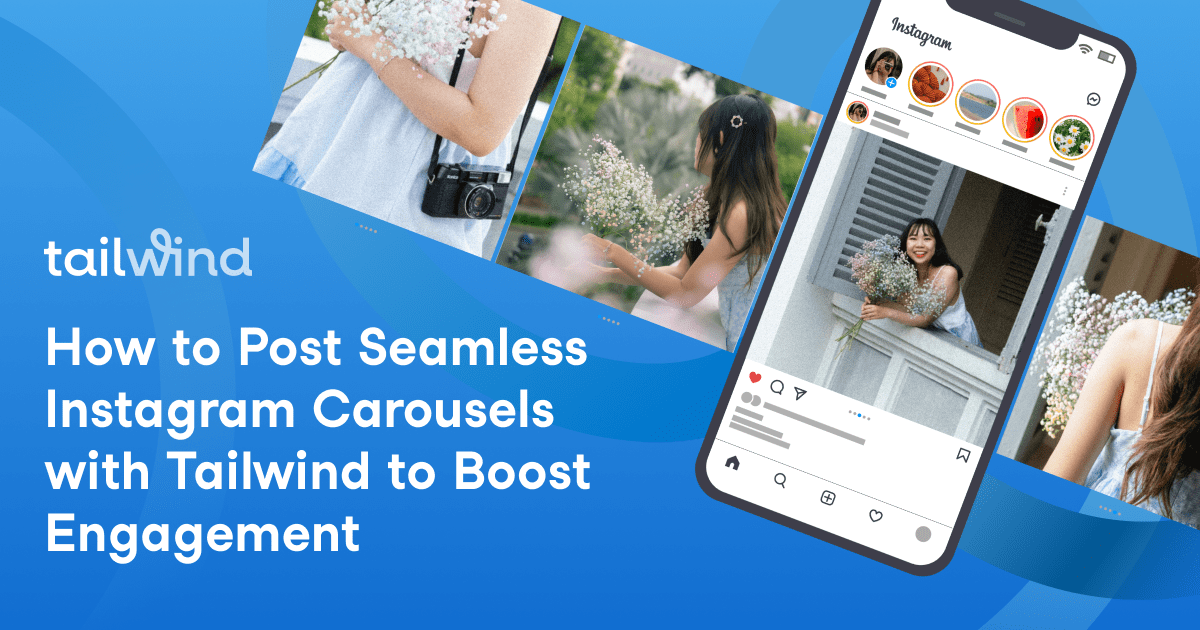
Instagram users can now use Tailwind to plan, schedule, and post multiple images or videos in a single post! But that is not all, we will also do all the heavy lifting for you. Instead of manually uploading your posts, you can now use Tailwind to automatically post Instagram carousels for you!

Tailwind’s carousel tool is available on desktop and mobile.

So, it functions as a mobile carousel app for Instagram, as well as an Instagram carousel scheduler for Mac and PC. 

Ready to get started? This blog post will walk you through step by step.

[sc name=”autopost-carousels-cta-skinny”]

1. Create New Post 

Tailwind’s Instagram carousel scheduler allows you to easily create new draft posts by uploading photos from your computer. 

Just open your Tailwind dashboard, and look for the “Working from scratch?” box. Here you’ll see Create Designs, and Upload Media.

With Create Designs, you can use our post creation tool to design stunning social media posts branded with your unique colors and fonts.

Or, you can upload photos from your computer! Here’s what to do:

  • Click Upload Media
  • Select Carousel Post
  • Upload Your Content!

2. Add Multiple Images to Your Instagram Carousel Post

From there, you will be able to select one or more photos or videos to upload from your computer, which will be converted into a carousel post.

It’s like an automatic Carousel photo app!

Once your post is in the editing stage, you will have the option to click “Add More” to add more images to your Instagram post. 

You can add up to 10 images or videos per Instagram post.

3. How to Edit Carousel Post Images 

Once you have your images uploaded, you can drag and drop them to change the order. 

The order on your screen is the order that the carousel that will appear on Instagram.

When users on Instagram swipe right, they’ll be taken forward through your carousel post.

When users on Instagram swipe left, they’ll be able to go back through the images on your carousel post.

If you’re wondering how to delete one picture from an Instagram carousel, just hover over the image you want to delete. A trash can icon will appear in the top right corner!

Be sure to Confirm your Instagram carousel before moving on to the caption so you don’t lose your progress!

Psst… Make sure to double-check everything before moving on as you can’t edit Instagram carousel post photos once they’re live!

4. Write Your Carousel Post Caption for Instagram

Now you’re ready to write a caption for the Instagram carousel you’ve just created. You can ‘make it yours by changing the font, adding spaces and line breaks, and adding emojis to your Instagram caption!

5. Add Hashtags to Your Caption

Don’t forget the hashtags! Tailwind’s Hashtag Finder will populate Hashtag suggestions based on your caption text as you’re typing.

Or, you can use saved hashtags from one of your saved hashtag lists.

Looking for something specific? Start typing a hashtag. You’ll see hashtag options populate, with color-coded popularity and the number of posts with that hashtag attached!

6. Select Your Post Method

Next, you’ll select your post method! You have two options: Auto Post, and Post reminder.

Tailwind can auto-post your carousel for you at your scheduled time, no follow-up required!

Auto posting features only work with Instagram business accounts, but don’t worry.

If you don’t have an Instagram business account, you can either switch over (it’s free and really easy!) to get the most out of Tailwind features, OR, Tailwind can send a post reminder to your phone when the time comes for your post, with the assets you need!

7. Schedule Your Instagram Carousel For the Best Time

Next, it’s time to schedule your Instagram carousel. Tailwind’s Smart Schedule will find the best times to post when your audience is most active on Instagram.

And, if you want to double-check what your feed will look like with a new post, scroll down to the Preview Your Grid section. This will show you your currently scheduled drafts and published posts, so you can get a look at what all your hard work looks like together!

Be sure to press the blue “Schedule post” button at the bottom once you’ve decided on a time.

[sc name=”skinny-cta-manage-your-instagram-profile”]

8. Post Your Carousel!

Your carousel is scheduled! If you have an Instagram Business account, there’s nothing else you need to do. Instagram Auto Posting is included in your Tailwind plan!

If you don’t have a business account OR selected push notification, keep an eye on your phone! At the scheduled time you selected, you’ll receive a push notification with your Instagram carousel images and saved captions to post directly to Instagram.

Use Tailwind to Schedule Your Carousel Post on Instagram

There you have it- just a few simple steps to creating Carousel posts on Instagram- without having to dedicate time to it every day. 

But being a carousel app for Instagram isn’t the only✨magic ✨Tailwind for Instagram is capable of. It’s easy and efficient to plan and schedule all your Instagram images, Instagram videos, and Instagram stories for the whole week using Tailwind’s Instagram planner.

The Tailwind blog is here for all of your planning and more tips on posting on Instagram to help you learn more about how to attract followers, grow your account, and drive sales from Instagram!

Be sure to check it out if you haven’t already! 

Pin Me For Later :

FAQs

What are the benefits to Instagram carousel posts?

Especially if you are a small business with products you want to show off, the carousel function can help you get more images in front of your followers in a more dynamic way! It offers you the opportunity to show off details, variety, and even the story behind the product.

Can you edit Instagram carousels?

Yes! As of November 2021, Instagram allows for the editing of your carousel posts. Once you have your images uploaded, you can drag and drop them to change the order. For more on editing your IG posts and carousel images, check out our in-depth blog!

What are the best sizes for Instagram carousel?

  • Instagram Video Carousel: 600px x 600px
  • Landscape: 1080 x 566 pixels
  • Square: 1080 x 1080 pixels
  • Portrait: 1080 x 1350

Do Instagram carousels raise engagement?

Carousels have been found to be one of the best ways to engage with your followers on Instagram! On average accounts that use carousels receive higher engagement compared to traditional posting.

Tailwind offers easy-to-use, personalized marketing plans with Copilot

Multi-platform marketing is a challenge for small business owners. Unlike your established brand competitors, you might not have the resources to hire dedicated marketing professionals to help you!

So what happens? You have to wear all the hats. Sales, order fulfillment, management, marketing… the list goes on. All that hard work doesn’t leave you a lot of time to become a marketing professional on the fly.

In fact, when we surveyed our users, we found that 46% of small business owners only have 0-5 hours of available time for marketing in a week. In contrast, the average marketing professional spends 16 hours a week just on routine tasks alone!

And that’s marketing professionals, who probably also don’t spend hours grappling with indecision and uncertainty about what to do, much less learning marketing tactics through trial and error. 

Small business owners rarely are marketing professionals, so it’s safe to say all that extra time learning and practicing marketing strategies eats up a lot more than those 5 hours per week. Not to mention, trying to keep up with the latest trends in digital marketing that seem to change every minute! 

Tailwind’s latest feature Copilot aims to tackle these problems head-on by giving small business owners the exact tools they need to market confidently on more channels in less time.

Personalized Marketing Plans Tailored to Your Unique Business

With Copilot, you’ll answer a series of questions about your business, marketing experience, and time available.

Then, you’ll receive an interactive personalized marketing plan that targets each stage of the customer journey- through awareness, consideration, and conversion campaigns.

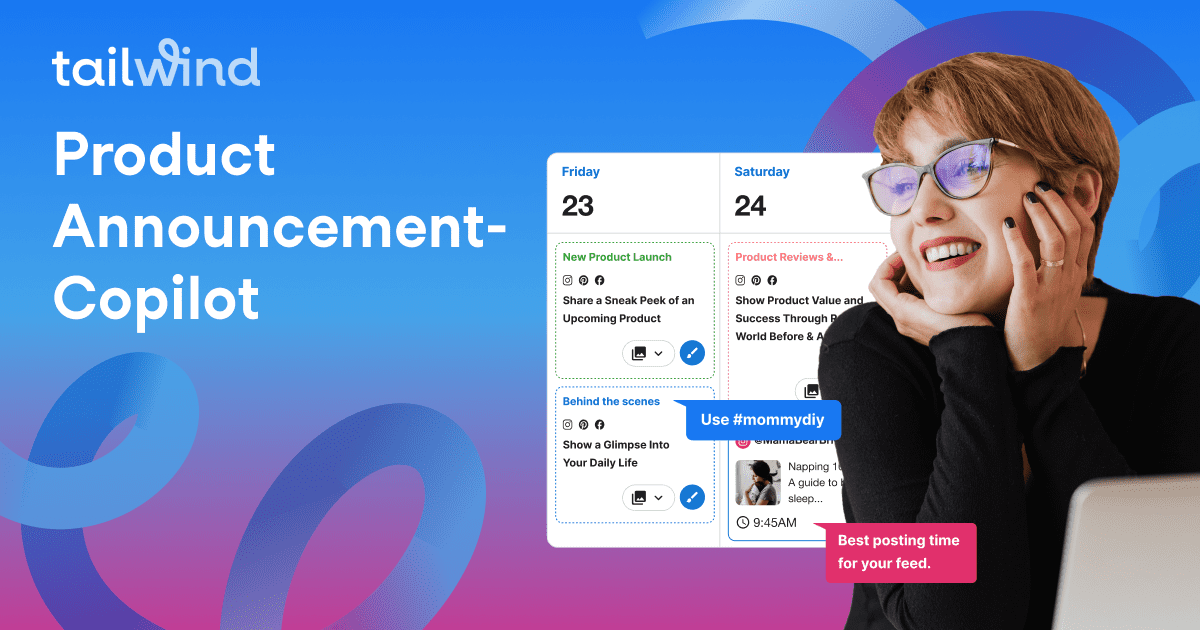
Tailwind Copilot

Tailwind Copilot enables you to:

  • Receive recommended campaigns customized to your business type and time available.
  • See detailed post suggestions for each part of the campaign, complete with prompts and real-world post examples from other small businesses to inspire you.
  • Create social media posts – and emails! – from hundreds of designs personalized to your brand in seconds.
  • Seamlessly schedule and publish your newly created content in one easy-to-use workflow.
  • Manage your marketing with a calendar view that shows you your upcoming marketing actions so you’re never caught off guard with nothing to post
  • Receive helpful email reminders to keep your marketing plan on track
  • Act on marketing best practices and industry-specific strategies so you’re spending your limited time on the most impactful marketing

Get Better Results From Your Marketing in Less Time

Using Tailwind Copilot removes the blockers that have set you back from the most impactful marketing for your business. Create and publish content guided by prompts and proven examples to remove the guessing game of what works! 

And the best part – your marketing is fitted to your schedule, not the other way around.


Let Tailwind plan your marketing for you by taking our 1-minute personalization survey (it really takes just one minute!), or visiting Tailwind’s Copilot page to learn more.

Want to hear from one of our members using Copilot? Jackie from Midnight City Tarot launched a product with Tailwind, and relies on Copilot to keep her social channels fresh.

Behind the Scenes with the Tailwind Team: Copilot


How to Take Good Pictures of Yourself for Instagram [Before vs. Afters!]

Raise your hand if you’ve ever tried to take an Instagram-worthy pic of yourself, only to wind up shooting, deleting, reshooting, deleting, reshooting… you get my drift here. ‍♀️

After a while, you just want to give up and post a pic of your puppy instead.

(Note: There’s nothing wrong with that. Instagram could use more puppies! )

But here’s the thing: your Instagram feed could use more photos of you, too!

Why? It’s simple. People connect with your face. Posting pictures of yourself helps your audience see that you’re real and connect on a deeper level.

So how to take pictures of yourself for Instagram?

That’s what we’re covering in detail today, so buckle up!

how to take pictures of yourself- girls standing on rooftop taking selfies
Our Tailwind selfie party

Plus, we wouldn’t be Tailwind if we didn’t go the extra mile for you and demonstrate our own before and after photos of these selfie-snapping tips!

That’s right – to help you learn how to take good pictures of yourself, our brave team willingly took questionable selfies to be posted on the internet…

Forever. #CustomerService

So what are you waiting for? Let’s have a selfie party!

[sc name=”ivory-mix-webinar-evergreen”]

1. Use the Proper Device

First things first – High-quality photos in social media reflect the brand’s quality and identity, even if it is your personal brand. But, to achieve it, you need to find a device that allows you to showcase all the ideas you have envisioned.

A high-quality image will capture your audience’s attention, communicate your message better, and show professionalism; some even believe it relates directly to increased engagement.

The good news is that nowadays, there are many available DSLR cameras and smartphones that make this task a bit simpler. So now, in the moment of truth, which of these two is better? 

We asked our social media strategist friends Marek and David and this is what they had to say:

Image size is another factor to consider because a low-quality camera might not provide the proper sizes to adhere to Instagram’s guidelines for photos and reels. To better understand Instagram image size, check out our article.

2. Find Your Lighting

Arguably the most important factor of a good selfie – LIGHTING.

If you’re puzzling over how to take pictures of yourself, the answer is definitely NOT doing it in dim rooms or super-bright artificial lighting.

Our world-class Community Manager Melissa bravely volunteered to demonstrate the difference for you.

First, she snapped a pic under the fluorescent lighting in her workspace.

This harsh lighting tends to wash out your skin tones and throw shadows into sharp focus.

Takeaway: Bright light does not equal good light.

However, when Melissa moved over to a large window and snapped her selfie, it made all the difference!

The natural light from the window illuminated Melissa’s features without washing them out! Her skin glows and her lips have color again!

Now it’s your turn! Here’s how to find your best light:

How to Take Pictures of Yourself in Great Lighting:

  • Shoot by a window or in a shady spot
  • If outside, avoid pictures in harsh mid-day lighting.
  • Experiment with taking your pictures mid-morning or mid-evening for soft, flattering light
  • Avoid light sources like house lamps (creates yellow light) or harsh bright lighting.
  • Don’t use flash if you can help it!

3. Practice Natural Poses

Let’s be real: it feels really awkward to pose for photos in a way that doesn’t look, well… posed.

If you’re anything like me when a camera is pointing your way you hit a variation of the same stance without even thinking about it!

(Mine is hand on the hip turned slightly to the side. Pageant style. )

There’s nothing wrong with a go-to pose, but it can quickly get repetitive in your feed. To amp up your Instagram profile and keep things fun, fresh, and interesting, you need to find natural-feeling poses that showcase you in the best way possible!

I know, I know. Easier said than done. That’s why our Chief of Staff Ellana offered to demonstrate!

In the before photo, Ellana strikes a basic pose for her portrait.

It’s definitely not a bad picture but doesn’t showcase Ellana’s fun, can-do personality.

In fact, by creating this enclosed shape with her arms, she’s unconsciously submitting a closed-off and uncertain look to the viewer.

In the after shot, Ellana relaxes back into her seat, leans on the armrest, and cocks her head slightly towards the camera. She’s adjusted to catch the lighting, and the uncertain posture is gone.

Now she’s just effortlessly cool!

Here’s how to take your own aesthetic selfies:

  • Use a mirror to check your poses. This might feel weird at first, but you’ll get a feel for which poses feel natural and expressive of your personality!
  • Use Time Lapse, an intervalometer, or photo bursts to try a few different poses in front of your camera to give yourself tons of options to choose from!
  • Take a million test selfies striking all kinds of poses. Find 3-5 signatures that you love, and practice until they are second nature!

Test All of Your Angles

Do you know your best angles? If the answer is no, you’re not alone. According to many group photos, I still haven’t found mine!

The good news is, they’re pretty easy to find with some dedicated practice! Ever heard someone stop a picture snap right to switch to their “good side”?

That means they know their best angle, or the most flattering angle to position their face or the camera in.

Our Pinterest Product Specialist Alisa volunteered to demonstrate a before-and-after of camera angles.

In her before selfie, Alisa has the camera angled down towards her face.

At the same time, she’s angling her face toward the camera 3/4ths of the way.

This changes the way the light hits her face in the shot, and accentuates away from one of her most gorgeous features: her eyes!

Boom! In her after selfie, Alisa is serving us a major smolder with two slight angle changes. She’s positioned the camera level with her eyes and tilted her chin at a slight angle.

Completely different look, right? Now you can see her eyes and the planes of her face are highlighted in all the right ways.

Here’s how to test all of your angles for perfect Instagram pictures:

  • Set up your shot with your desired settings, exposure, and focus.
  • Use the TimeLapse, Photo Burst, or intervalometer (on most DSLRs) to quickly take variations of the same photo from the same camera angle.
  • Focus on angling your chin, forehead, head, and body in different positions and angles. Keep full, 1/2 (profile), and 3/4 (turned slightly away) in your mind for all of these.
  • Reposition your camera higher or lower and repeat!

You will absolutely have a million photos to look at, but you’ll quickly get a feel for where the camera needs to be and where your face and body should be angled to get the most flattering looks!

5. Grab a Tripod

Unless you have the cash to burn on a live-in photographer, chances are you’ll be taking photos by yourself most of the time.

Knowing how to take pictures of yourself alone will change your selfie game.

One of the best ways to do it? Grabbing a tripod! You can find extremely affordable phones and camera tripods on Amazon.

Many of them are even equipped with a handy Bluetooth remote that allows you to snap an Instagram picture without touching your phone!

Our ace Customer Success Associate Sarah was more than happy to demonstrate for us!

how to take pictures of yourself alone - woman posing in front of tripod

Here’s Sarah’s before selfie.

It’s super cute!

Buuut you can see Sarah’s “selfie arm” that makes a self-portrait look a little less polished than we’d like.

Plus, when you hold your camera yourself, you can’t catch all the details of your great outfit. Boo!

It’s also tough to capture full lifestyle shots that tell a story this way.

In Sarah’s “after” selfie, she’s able to back up and strike a flattering pose using a simple stand and her iPhone’s self-timer.

Adorable, right?

Here’s how to take good pictures of yourself alone with a tripod:

  • Attach your device to your tripod and check for potential slipping and stability.
  • Adjust your exposure and focus to your desired settings.
  • Mark where you need to stand for your best shots.
  • Snap away!

6. Perfect Your Composition

Composition is a key part of a good photo, whether you’re taking product photos with your iPhone or a selfie!

Our Customer Success star Doricia was on hand to show you the difference composition makes. Let’s take a look!

In her “Before” photo, Doricia serves us a major look from a couch.

This photo is great, but the balance and composition are a little off.

If you imagined a grid over this photo, dividing it into 9 squares, you’d notice that it’s off-balance.

There’s more white space at the top of the photo, and the subject skews to the left.

In her after selfie, the composition of this shot is way more balanced. Doricia is centered in the photo, and it’s balanced on either side.

Here’s how to perfect your photo composition:

  • Enable the Grid on your camera (under Settings > Camera)
  • Practice lining yourself up with a vertical line on the Grid, or at the intersection of two lines
  • Balance your photo as much as possible with symmetry (if you fold the photo down the center, there should be an almost equal amount of detail on either side)
  • Scan your surroundings for unsightly clutter, details, or items that might distract the eye.

7. Put Finishing Edits on Your Photos

While we’d love to nab the perfect selfie on our first try, most photos could benefit from a few finishing touches in an editing app.

From lighting tweaks to blemish removal and softening, you can make your self-portrait shine with just a few taps!

Our Inbound Marketer Jordan demonstrates the subtle effects of a few edits using a selfie, and Adobe Lightroom.

Jordan’s “before” selfie is great!

However, it’s just a smidge too dark, which can make detail hard to see.

Plus, she’s taking her picture against a greenery wall, which looks a tad faded.

A punch of extra vibrance will make that colorful backdrop stand out!

A few lighting and color tweaks and voila!

Jordan’s face is illuminated with a gentle nudge of exposure, and the shadows on her face now aren’t as harsh.

You can also tweak selective colors in most editing apps.

That made it a breeze to increase the saturation and luminance of the green backdrop!

To put the final touches on your selfies, download an Instagram photo editor (we discuss the pros of our five top favorites!) and experiment with edits until your selfie is just right.

8. Play with the Settings on Your Camera

Before you go through the process of uploading your selfie to an app and making tweaks, poke around and see if your camera settings can’t manage some of those edits already!

For example, the settings in my iPhone 11 Pro often remove the step of editing my Instagram photos!

Here’s my own example selfie!

In this shot, I used the Portrait setting on the iPhone. This softens the background of your photo and makes the photo subject clearer!

The lighting is pretty good as is, right? #ThatNaturalLightTho

However, I often add the Studio Light setting to get a little extra brightness and crisp focus to my photos.

I’ve added that Studio Lighting to my after photo. Overall, my face, eyes, and hair are a pinch brighter and stand out more!

And the best part, I didn’t even have to open this selfie in one of my apps for editing.

How to Take Good Instagram Pictures of Yourself with Your Camera Settings:

  • Take yourself on a tour of each camera setting to understand what they do, and their best uses!
  • Set and lock the focus of your selfie (you!) to make sure that you don’t lose sharpness or clarity.
  • Pre-adjust your exposure and lighting on your camera before snapping your shot – this removes a common finishing touch!

Check Out Our Photography Webinar for More Tips!

Whew! That was a lot of tips and tricks for taking good photos of yourself for Instagram! And guess what? There’s more where that came from!

Sign up for our FREE Smartphone Photography webinar to go even-more in-depth on:

  • Different types of lighting and how to work with each
  • The art of photo composition and interesting tricks to try
  • Perspectives and angles (with examples)
  • Step-by-step editing tutorials in Lightroom (you can apply these to any of your favorite apps!)

Did we mention it’s absolutely free? Don’t hesitate- view our webinar right now!

[sc name=”ivory-mix-webinar-evergreen”]

9. Start Scheduling Your Selfies to Instagram

Now that you’ve learned how to take good photos of yourself for Instagram… it’s time to get those beauties onto your feed! You can easily and quickly schedule all of your beautiful posts with Tailwind’s publishing tool.

Just upload your photos into your drafts and arrange them with our visual Instagram planning tool – the 9- Grid Preview.

Our Smart Schedule tool will analyze your best times for engagement and create calendar slots for each. Tada! ✨

And if you prefer to set it and forget it, just enable Auto Posting for Instagram Business accounts! Tailwind for Instagram will do the heavy lifting for you and post your amazing selfies on your behalf at the best times. ⏱

Can’t wait to try it out? Sign up for the forever free plan of Tailwind for Instagram – no credit card required!

[sc name=”autopost-carousels-cta-skinny”]

Pin It For Later :

How to Create a Perfect Marketing Strategy Plan

Businesses are faced with challenges every day when planning campaigns for their brands. Between working hard to find the best ways to share content with your audience, bring in leads, and drive conversions, it’s easy to get lost in the details and forget the big picture of what you’re trying to achieve!

A marketing strategy plan is just that – a big picture. It can help you step back and look at how all your individual marketing actions work together, then guide all aspects of your marketing. What follows are comprehensive and simple steps on how to complete a marketing strategy plan for your brand!

What is a Marketing Strategy Plan?

A marketing strategy plan is a broad look at how a business approaches reaching its audience. Marketing strategy creates a birds-eye view of how a brand can engage with its audience and defines key elements such as the business’s value proposition and core brand messaging.

There are four components of a marketing strategy plan that should be taken into account: product (or service), price, place, and promotion.

Understanding how your business will approach these four elements is critical for your success.

If you have been getting by just fine without creating a formal marketing strategy up until this point: good for you!

However, this can be a risky approach, especially as marketing strategies, platforms, and methods evolve with the current times.

If search algorithms shift in the wrong direction, a new competitor steps into the arena, or if your audience catches onto a different trend, it can be difficult for you to adjust without a proper strategy on how to respond.

It may seem difficult or unnecessary, especially if you’re a small business. However, creating a marketing plan for busy and small business owners can take as little as 30 minutes!

Marketing Strategy vs Marketing Plan

You may be wondering, what’s the difference between a marketing strategy and a marketing plan? Aren’t those the same thing? In fact, they’re not!

A marketing strategy outlines how a company will achieve a particular goal. This includes the content, networking channels, software, and campaigns that will be used to achieve that goal. It also includes ways that the business will evaluate and track its progress and success.

Meanwhile, a marketing plan focuses on how your marketing strategy will be executed. It’s the foundation for how your business will achieve its goals. The difference can be better understood as big picture vs small picture. One cannot exist without the other.

Without a marketing plan, it will be more difficult to set your sights on your goals. Without a marketing strategy, it will be harder to execute your plans to achieve the goals you set.

Example: Strategy and Planning for a Fashion Brand

To better understand the difference and relationship between marketing strategy and marketing planning, a fashion brand is a good place to start.

Before the business can start working toward success, it needs to understand its goals and come up with an overarching marketing strategy for how to achieve them. The business needs to evaluate its audience and come up with concrete marketing plans to achieve those goals.

For example, the business may be in outdoor and hiking clothes. They can then identify their audience more specifically and come up with more specific goals.

After the business marketing plan is complete, the business can develop specific strategies to realize its vision. For example, they may decide that a content marketing campaign during the spring or winter will be effective because their customers may want to prepare for the warmer weather in the summertime.

They can measure their progress via metrics they set and adjust in response to market changes.

10 Steps to Plan Your Marketing Strategy

If you want to make an effective marketing strategy to form the foundation of how your business will achieve its goals, here is a comprehensive list of steps that will help you do just that!

1. Business Information

The first step in creating a marketing strategy is to know your brand. It’s essential for every business to acknowledge who they are, their mission, goals, methods, and unique selling points.

Part of this is a value proposition, what your business can deliver to your audience. This unique selling point is what will help you better understand what your goals should be and create the context for what you’re going to do to reach them.

2. Set and Analyze Goals

Business goals are objectives your team aims to achieve. Remember to distinguish short-term goals from long-term ones. Use SMART Goals to guide you through this process:

  • Specific: clearly defined.
  • Measurable: quantifiable and able to be recorded.
  • Achievable: realistic and within your ability.
  • Relevant: useful to your business and your audience.
  • Time-bound: able to be achieved during a specific period of time.

3. Marketing Audit

This takes the first step of knowing yourself and takes it a step further. Where the first step of knowing your business was more about vision and your value proposition, your marketing audit is more about evaluating the status of your current marketing activities and the resources you have on hand right now!

Don’t throw out your past work, either! You can always learn from what you’ve done in the past. Look at what has worked and what hasn’t. Come up with ideas of what you can do better. Take a closer look as well at the people, knowledge, and tools that you have at your disposal as well.

4. Marketing Analysis

A marketing analysis involves understanding how you fit in an industry, your competitors, your audience, and other variables in the market. You can use a SWOT Analysis to help you evaluate this. SWOT stands for Strengths, Weaknesses, Opportunities, and Threats. Understand how each of these applies to your brand and consider these aspects for your marketing strategy.

It’s important for you to do research into your competitors and see what they’re doing well, and what could be better.

This is also the stage of your planning process where you want to define your marketing channels. For example, you will need to choose which social media platforms make the most sense for your brand to focus on, based on where your audience most likely is.

5. Define KPIs

Keeping your marketing quantifiable and trackable involves setting specific metrics you want to track. These are called Key Performance Indicators (KPIs) and are very important for you to keep track of over the course of your marketing. KPIs help you understand how close you are to achieving your goal. An example of a KPI might be website traffic or social follower count.

Every business needs to track relevant KPIs. In fact, KPIs are directly impacted by the objectives that have been defined by your business! It also involves asking ‘key performance questions about your marketing. For example:

  • What is my end goal?
  • How can I track my progress toward that goal over time?
  • When will I achieve my goal?

6. Identify Your Target Audience and their Pain Points

Knowing your target audience is one of the most critical components of marketing. Instead of selecting an audience at random, think carefully about who would want to buy your product.

Do demographic research into this group to understand them more deeply and to learn about their interests. Some demographics you’ll probably want to know are age ranges, gender, geographical location, hobbies, and interests.

More importantly, you’ll need to identify their pain points. This is how you’ll help make their lives easier!

A pain point is a particular problem that your audience faces. Problems like these are opportunities for you to connect with your audience and give them exactly what they want and need.

There are a few types of pain points:

  • Financial: your audience needs help managing, saving, or earning money.
  • Productivity: people are looking for ways to help them stay more productive or save and manage time.
  • Process: the people you are trying to reach are looking for a more efficient way of solving their problems.
  • Support: your customers need support in finding what they need for themselves.

You can find pain points through several methods. Research can help, but it can only take you so far. Customer interviews are a great way to get better acquainted with the people you are trying to reach and understand their problems. Reviews of your business can also help you understand opportunities to improve and provide new or revised products and services.

7. Actions to Achieve Goals

Now that you’ve identified the pain points for your audience, it’s time to identify how you’ll solve their problems!

Once you have identified those problems, it’s crucial that you acknowledge what your business can provide to alleviate the issues your customers are experiencing. Create a list of actions you need to complete your strategy.

Consider all the tools you will need to complete these tasks. It’s also important that you consider who will be carrying out each task. Delegate effectively to ensure that your strategy is carried out efficiently.

8. Determine a Budget

A marketing budget is the cost of your marketing strategy plan. It’s the cost of achieving your goals. It may have sounded very challenging to create a marketing budget before you started this journey. However, now that you’ve gone through all the steps up until this point, it’s a lot easier! If you’ve been thorough about your goals and how you intend to achieve them, it’s much easier to quantify the cost.

There are a few important stages involved in determining your budget:

  1. Consider your income. This is the bottleneck of what you can afford. If your plan is out of the scope of your income, it’s time to reconsider the scale of your marketing strategy.
  2. Calculate the cost of each action you decided on from earlier in your plan. This will allow you to determine the grand total in the end.
  3. Recall what channels you chose to achieve your goals. Are there any costs associated with these channels?
  4. Keep track of your actual spending over the course of your plan. Include KPIs in your measurements to better identify and understand costs.

9. Implementation Times, Contributors, and Responsibilities

Before you jump into your marketing strategy process, make sure you consider when you will be putting specific parts of that plan into action. Implementation times are when you intend on executing certain actions of your strategy.

One of the best ways to do this is to keep a calendar of events and who will execute them. The people to who you delegate these tasks are contributors.

A useful tool that can help, aside from a calendar, is a Gantt chart. Similar to a calendar, this chart helps you visualize what each task is, when they begin and end, their duration, event overlap, who will execute each task, and when the larger project begins and ends.

10.  Monitor and Report

You’ve done a lot of hard work up until this point and you’ve come a long way!

Your marketing strategy plan is underway, and you are set for success. The last cherry on top for your brand is to monitor and measure your progress.

This stage is essential for your continued growth because it can provide insightful data that will help you make decisions regarding your current and future marketing strategies. It also helps you pivot when necessary to react to changes in the market or your audience’s interests.

Main Types of Marketing Strategies

Marketing strategies are critical for every business to ensure that its goals are being met and that its results are being monitored and recorded.

It’s a good idea to consider marketing strategies specifically developed to strengthen a particular aspect of your marketing.

Some of the most popular types of specific marketing strategies are brand positioning strategies, content strategies, social media strategies, email marketing strategies, and paid media strategies.

Brand Positioning Strategy

This strategy focuses chiefly on furthering the voice and image of your business. The advantages of this strategy are that it can actively influence your business’s reputation with your audience, influencing their viewpoint on your brand.

This is all about connecting your unique value with your audience at every aspect of your funnel. This allows you  to strategically create meaning in the mind of your audience when they see your brand.

Content Strategy

A content strategy involves creating and distributing content that advances your marketing goals. This is one of the best ways to boost your digital marketing.

Potential customers use search engines every day, and this strategy allows you to leverage your content to attract and convert these potential customers. One of the key elements of this strategy is creating relevant content. It could be in the form of videos, blogs, infographics, podcasts, white papers, webinars, or eBooks. Whatever your content is, think critically about how it can benefit your business strategy.

Social Media Strategy

A social media strategy focuses on marketing to users on social media platforms like Twitter, Instagram, Pinterest, and more.

A critical component of successful social media strategies is that they outline the content that can be shared across multiple social media channels. Successful plans also take into account how the branch should interact with its audience. This makes it much easier to manage multiple social media profiles! Another important aspect of social media strategy is that it gives people access to information about your brand that they find relevant.

This gives them the opportunity to share that information on social media with friends and family. This can help you attract even more customers!

Email Marketing Strategy

An email marketing strategy focuses on converting potential customers into email subscribers. Once users turn into subscribers, the brand can regularly distribute emails that drive customers and potential customers to the brand to make purchases.

This can be especially effective to keep people coming back for additional purchases by suggesting new content. Email is convenient, and this encourages recipient engagement. It’s also possible to use workflow automation to schedule personalized emails for each client.

Email marketing strategies can also generate a great return on investment.

Paid Media Strategy

A paid media strategy is all about buying advertising online. There are a lot of different kinds of paid media that are available for marketing. For example, there are social media ads, display ads, video ads, pop-ups, paid search results, and many other kinds of promoted media.

Paid media is particularly great at boosting traffic, clicks, and brand awareness!

Conclusion

Now that you know how to create a business marketing strategy, you’re ready to get out there and make one! Always remember that it’s incredibly important to always follow each of the steps covered in this guide when creating your plans.

Every step plays a critical role in creating your marketing strategy. If you follow each step, have great attention to detail, and have clear and well-defined goals, you’ll be able to better drive more conversions and achieve a better return on investment.

One way to make this entire process easier is to use an app like Tailwind that can help you create and schedule content across your most-used platforms, including email! Best of all, you can use many of our great features for free with our forever-free plan!

Pin It For Later :

The perfect guide to understanding and creating the most practical and comprehensive marketing strategy plan in 10 easy steps.

9 Email Marketing Metrics you MUST Know (2022)

Email marketing is one of the most effective marketing strategies there is. It helps you strengthen relationships with your customers while still being able to reach out and establish a connection with potential customers. The best part is that for every $1 you invest in email marketing, you can expect an average return of $42, which is an astounding 4,200% ROI.

Curious to learn more about the basics of email marketing? Check out our blog post: How to Get Started in Email Marketing!

However, to see such results, you must attract attention before you tell your story. So, how do you know if your email marketing campaigns are making an impact? Here are the top email campaign metrics to help with your email marketing strategy:

1.Open Rate

Open rate definition: Percentage of the subscribers who opened your email.

Open rate formula: 50 Opens/ 200 Emails delivered * 100 = 25%

Your email open click rate is one of the most reliable metrics when measuring your email marketing campaign’s performance. Email open rate refers to the number of people who opened the email you sent.

To calculate your email’s open rate, take the number of emails your recipients opened and divide it by the total number of emails sent then multiply by 100.

Email open rate by send date in Drip

Depending on your industry, a healthy open rate tends to range between 15% to 25%.

If your open rates are too low, you can try the following tricks to boost them.

Improve your email marketing subject lines

Your email subject line is the first thing your customer will see. It determines whether or not they will read your email. To be effective, your subject line must be catchy, clear, and coherent.

Time your emails

The best time to send a marketing email is 10:00 am on weekdays. Avoid sending emails on weekends and conduct A/B testing to determine the best time to send your emails.

Something important to note is that open rates, unfortunately, may become more and more unreliable as time goes on. Because of this, your email marketing efforts should not rely on open rates as the north star of success.

Jordan Douglas, our Lifecycle Manager (and email marketing aficionado) explains:

“iOS 15 has new privacy protections in it, specifically in the Mail app. Their Mail Privacy Protection option stops senders from using pixels to collect information about the user. It helps users prevent senders from knowing when they open an email and hides their IP address so it can’t be linked to other online activity or be used to see their location.

In other words, targeting people based on online activity, lead scoring, and retargeting are going to get harder. It will also remove the ability to track open rates, which has a ripple effect when it comes to cleaning up your email list. That’s usually based off of open rates, which won’t be accurate anymore.”

Jordan Douglas

Create top-notch content

Once you’ve timed your emails properly and used a catchy subject line, you need to keep your leads reading by giving them great email content. Try personalizing your content, add some storytelling and some mixed media, and don’t forget to include an effective CTA.

High-quality email content will ensure you get steady traffic. Remember, people are more likely to open your email if they liked the last one. Don’t waste their time – provide value!

Want to learn more about email marketing? Check out our library of email marketing below. You’ll find all kinds of content from the basics of B2B email marketing to writing welcome emails!

[sc name=”image-cta-email-marketing-resource-library”]

2. Clickthrough Rate

Clickthrough rate definition: Percentage of people who click the links inside delivered emails.

Clickthrough rate formula: 50 Clicks/ 500 Emails Delivered * 100 = 10%

Once you’ve worked on ensuring your readers are opening your emails, it’s time to gauge their engagement. Your email click-through rate will help you track how well your emails are performing.

Your email click-through rate is the percentage of email recipients who clicked on a link in your email. To calculate your click-through rate, divide the number of clicks by the number of emails you sent and multiply by 100.

On average, the click-through rate for most campaigns is 4%.

Your click-through rate will help you determine which customers are genuinely interested in your brand or products.  It will also show you how engaging your content is and is a great tool for maximizing your conversion rates. So, if your click-through rate is not where it should be, try the following to improve it:

Personalize your emails

To engage your audience, you must send them content that resonates with them. For instance, you will not get much engagement from a vegan if you are sending them emails full of the benefits of red meat. Only send information that your audience is interested in.

You can also take personalization a step further by addressing your audience personally. Ensure that each person reading your email feels as if you wrote the email just for them. You can achieve this by using the reader’s name on the email subject line and writing as if you are having a face-to-face conversation with them.

Write engaging content

Your emails should be worth your readers’ time. They should be full of value and interesting enough that your audience looks forward to them. To make your emails more engaging, always proofread to remove errors, maintain a flow of information that is relevant to your audience, use the correct formatting and add a few GIFs.

Nail the preview text

After reading your email subject line, the preview text is the next thing your reader sees.  Your preview text affects your open rate as much as your subject line, so it helps to ace it.

The easiest and safest way to nail your preview text is to directly ask your reader a question. For instance, “Dear XYZ, would you like to boost your website traffic?” asking a question helps strike a conversation with your reader. It also intensifies their curiosity and makes them want to open and engage with your email.

3. Conversion Rate

Conversion rate definition: Percentage of people who completed the CTA, be it registration, purchase, download, or any other goal that you had.

Conversion rate formula: 20 CTA completed/ 500 Emails Delivered * 100 = 4%

Another email marketing analysis metric that is key to determining the success of your email marketing campaign is your conversion rate. Your conversion rate is the number of leads that have become actual customers after reading your emails.

Conversion is the ultimate goal of any email marketing campaign. You want people to open, click through, and engage with your content, but most importantly, you want them to become your loyal customers.

To calculate your conversion rate, divide the number of people that have converted with the total number of emails you sent and multiply by 100.

Here are some tips to help you increase your conversion rates:

Segment your email list

No matter how great your emails are, you will not see any conversion if you are targeting the wrong people.  Take time to divide up your email list depending on different factors such as age and geographical location among other factors. You’ll want to do this sooner rather than later, with the new updates to privacy protections coming from iOS.

Next, create different email content for different groups of people so you are sure you are sending the right message to the right people.

Ensure your content flows

Start your email with a catchy subject line, great preview text, engaging content, and lastly, a well-optimized CTA.  This is the flow that works for most bloggers and businesses. If you mix up your content, you won’t see many conversions.

Keep it short

There is no specific email length that works for everyone. That being said, no one has time to read unending ramblings in today’s fast world. Short and sweet is your best option.

4. Bounce Rate

Bounce Rate Definition: Percentage of emails that were not delivered.

Bounce Rate Formula: 5 Undelivered emails/ 100 Emails Sent *100 = 5%

All the email marketing metrics we have discussed so far won’t be of use to you if your emails are not reaching their intended recipients.  Your email bounce rate measures how many emails are not reaching your lead’s mailbox either because the Id is inactive or fake.

To calculate your bounce rate, divide the number of bounced emails by the total number of emails sent then multiply by 100.

A bounce rate of more than 2% means you need to take urgent steps such as:

Monitor your list

Go through your subscriber list and eliminate all fake-looking IDs and those with inactive domains.

You can also activate the double opt-in option so that people have to confirm before subscribing to your email list.  This is an excellent way of only enlisting people who are interested in your brand. It also helps you avoid adding emails from spambots.

A/B testing

With a/b testing emails, you can divide your subscribers into two groups and send each group a different email. This way, you can measure the bounce rate of each email and try to find out what caused a higher bounce rate in one group by determining what you did differently.

When measuring your bounce rates, it’s important to distinguish between a soft bounce and a hard bounce. A soft bounce happens when there is a temporary delay in sending emails. This can happen when the servers are overloaded and should not be a cause for concern. Eventually, the email will get to the recipient.

A hard bounce, on the other hand, is one where the mail comes back saying that the email ID is incorrect or the domain doesn’t exist. This is the king of bounce that you want to avoid.

5. Unsubscribe Rate

Unsubscribe rate definition: Percentage of people who unsubscribe from your email list.

Unsubscribe rate formula: 10 Unsubscribes / 500 Emails * 100 = 2%

There are a number of reasons why people might unsubscribe from your email list. It could be because they no longer find your content relevant, or they just entered their email to get the lead magnet that you were promoting.

Whatever the reason, it’s important to keep an eye on your unsubscribe rate so that you can make changes to improve it.

For example, you might just have one bad email blast or a small mistake in your email marketing process. Something in your copy triggered a higher level of unsubscribed than usual. This is nothing to worry about. Just make sure not to repeat that mistake in your next emails.

If you’re seeing a constantly high unsubscribe rate, it could indicate that you need to change up your content or offer more relevant information to your audience.

You want to get your unsubscribe rate as low as possible. Usually, it is around 1%, but the lower, the better.

The rate you see will also depend on how you built the list. If you have a highly interested audience and a relevant offer – the bounce rate will be really low.

If you’ve purchased a list or used very little personalization in your email – the unsubscribe rate will be higher.

Here are some tips to keep your unsubscribe rate low:

  1. Keep your content relevant to your audience.
  2. Make sure you’re offering value in every email.
  3. Personalize your emails.
  4. Build quality lists from the start.
  5. Have a clear From field.
  6. Don’t use clickbaity subject lines.

6. Subscribers Growth Rate

Subscribers growth rate definition: New subscribers that joined your email list in a set period of time.

Subscribers growth formula: 500 New subscribers / 1000 Original list size 100 = 50% or 2250 New list size / 1000 Original list size 100 = 225%

Your email list should always keep growing! A good subscriber growth rate depends on the size of your list. If you have a small list, a higher percentage may be attainable. The bigger your list size is, the smaller the percentage will get.

Emails in your list will decay naturally. Some subscribers will stop using that email, some will be receiving your message in their Promotion folder, and some will just unsubscribe.

In order to not “burn out” your email list, you must constantly feed the funnel with new leads.

Limited offers, discounts, and lead magnets – are all great ways how to interest new subscribers in joining.

Make sure your lead magnet is high quality and relevant to your target audience! If it’s not, you’ll have a hard time getting people to sign up and an even harder time keeping them as subscribers.

7. Email Sharing Rate

Email sharing rate definition: Number of times people forwarded or shared your email.

Email sharing rate formula: 10 Shares or Forwards / 220 Emails delivered * 100 = 4.4%

You want to keep an eye on your email sharing rate because a high number means that people love your content and are willing to share it with others. A low number could indicate that your email isn’t really hitting the right spot.

Not all emails need a high sharing rate. For example, an email with a purchase CTA would focus on the clickthrough rate. These types of emails are usually not shared.

On the other hand, a message with a referral offer or an infographic would benefit from forwards and shares.

When looking at your sharing rate, also consider the type of email you’re sending. If it’s a timely message or announcement, it may not have a long shelf-life and, therefore, won’t be shared as much as an evergreen piece that is tightly related to your topic.

8. ROI 

ROI definition: Return On Investment shows how much money you earned vs. how much you had to spend.

ROI Formula: $500 Earned / $100 Spent * 100 = 500%

You may wonder what would go into your Earnings. Any monetary value you received due to a CTA in your email campaign would count as earnings (or revenue). All the purchases and upgrades subscribers bought through the CTA link in your email would fall into this group.

On the other hand, Spending (costs) would include all the financial resources you spent to make this campaign happen. Cost of leads acquisition, email copywriter salary. email service subscription price – everything should be accounted for. Just make sure to calculate the final result proportionally.

Continuing on the financial topic, here are two other email marketing metrics that are worth following:

  • Revenue per subscriber – revenue calculated per each subscriber.
  • Subscriber lifetime value – total revenue that a subscriber brings in the “lifetime” on your list.

We also wanted to share a couple of tips on how to grow your ROI after the initial purchase.

Cross Selling

Cross-selling should always be a part of your email strategy. It’s a great way to increase the amount each customer spends. Selling your readers complementary products that are related to what they just bought from you.

For example, if someone buys a pair of shoes from you, you could cross-sell them with socks or shoe laces.

The point is, it is much easier (and cheaper) to sell to an existing customer than it is to find a new one, so make sure you are always looking for ways to increase the value of each customer.

The best way to do this is to focus on creating quality content that your readers will love and then gently introduce them to complementary products they may need.

Cross-selling is just a part of post-purchase email options. This type of email marketing campaign can significantly increase the ROI and the LTV of the subscribers, so make sure to give it a look!

9. Spam Rate

Spam rate definition: Percentage of users who marked your email as spam.

Spam rate formula: 2 Marked as spam / 1000 Emails delivered * 100 = 0.2%

In an ideal scenario, your spam complaint rate should be 0, but as your email list grows bigger, it will not be possible.

Still, 0.1% is roughly the maximum that your spam rate can be at any given time. Anything bigger is a major reason for concern. In the long run, high spam rate damages the sender’s reputation, lowers the number of delivered emails, and can even send them right into the spam folder, without the user even seeing them.

How to reduce your spam rate:

  1. Keep your email list clean.
  2. Consider double-optin.
  3. Have a clearly visible Unsubscribe button.
  4. Don’t use clickbait titles.
  5. Each email should have value.

For more tips on how to get higher deliverability and not fall victim to spam filters, check out this post.

Email Measurement Metrics & Analytics Tips

These are the main email engagement metrics you should be tracking. But depending on your business goals, there are other things you can track as well, but they are of lesser importance.

The main slogan here is “You can’t improve what you don’t measure”, so we wanted to share a couple of overall tips that will help you make your email marketing campaigns better.

Analyze The Outliers

It may happen that email campaign metrics on one of the emails will be off the charts. It can swing both ways, good and bad.

It can be caused by various factors. Sending time is one of the most frequent ones. It might be a slow day, a holiday, or other important events happening.

Pick A Good Platform

Make sure that you picked an email marketing service that is able to show you all the metrics and analytics that you might need.

Sure, all of the email marketing tools have some kind of dashboard and reporting – just make sure that it tracks and shows the data that is important for your line of business!

If you didn’t know, Tailwind brings social media management and email marketing into one unified marketing management platform — making it easy to make your separate marketing channels work together. Tailwind’s email marketing capabilities have built in best practices to ensure you meet the ideal numbers for all your email engagement metrics and not to mention, beautifully displays your key email campaign metrics in an easy-to understand way.

Experiment A Little

It goes without saying that digital marketing is built on A/B testing. We spoke about that in the prior section.

Apart from those tests, from time to time – do a bigger experiment. Completely change the hook or the offer in your email. Structure the pricing differently or just create a whole new funnel.

From time to time, you need a radical 180-degree change to discover new opportunities!

Final word

Email marketing is a cost-effective way of promoting your brand. However, it requires you to keep tracking and optimizing the key metrics we have discussed to increase your chances of success. 

If you are just starting your email endeavor, the metrics listed in this post could easily become your KPIs for email marketing! We hope this blog post helped you learn a little bit more about email marketing metrics.

In the case you need a free option to get started with email marketing, Tailwind is the best email marketing and social media marketing management platform combined into one. With built-in email marketing best practices and analytics to measure your email marketing campaign metrics, you’re sure to measure the success of your email campaigns in no time! Sign up for FREE below!

[sc name=”email-marketing-you-could-do-in-your-sleep”]

With new user privacy protections in iOS 15, there's never been a better time to understand email marketing metrics and what (and what isn't) a solid indicator that your efforts are working. Check out our quick guide to learn the ins and outs!


How to Build a Successful Content Marketing Plan

We’ll get straight to the point: content marketing plans are important. Brands with content marketing plans have been shown to net larger profits, lead to more subscribers, and promote business success. Given that 97% of businesses and organizations use content marketing strategies to promote their brand awareness, it’s important to consider how you’ll share your own content with the world!

You need to strategize how to connect with your audiences and think critically about exactly how you’ll increase leads, social media presence, and brand awareness.

And building a successful brand isn’t just about having high-quality content and posting frequently (although that certainly helps.)

If you’re sitting on a collection of content and are ready to share it with the world, creating a thoughtful content marketing plan can set you up for success! Let’s talk about how you can best utilize your content and your brand to connect with your audience!

What is a Content Marketing Plan?

A content marketing plan is a marketing strategy for content creation and distribution. It helps marketers keep their content relevant, meaningful, and consistent when engaging a specific target audience. The ultimate goal of a content marketing plan is to generate profitable customer engagement with a business’s content. 

Content marketing plans are made up of several different steps that aim at achieving the goals of the larger campaign. Each step builds on what came before – here’s a helpful visual!

Businesses that don’t use content marketing plans will have no way of knowing their goals or how to measure their progress toward accomplishing them. This is why developing a measurable, goal-driven plan is so important for organizations!

If you need to create a new content marketing strategy, or if your current strategy isn’t working as you’d expect, take a step back and reflect on your brand. You’ll first need to define some goals to work toward. After that, it’s time to research your audience, platforms, and other important elements that are crucial to your success! 

You will also need to audit your existing content marketing practices. From there, you’re ready to allocate your resources, create content, and then push that content out to the wild.

Along the way, always remember to measure your progress and adjust your strategy accordingly as you get feedback from your audience. They are who you’re trying to reach, so listening to them will set you up for success!

1. Defining Goals for your Content Marketing Plan

SMART Goals- Specific, Measurable, Achievable, Realistic, Time-Sensitive

The purpose of a marketing plan is to achieve a goal. Because of that, it’s important that businesses set quantifiable (read: numbers!) and realistic goals that they can achieve instead of qualitative ones. For example, “get a lot of followers on Instagram” is not as specific as “gain a 10% increase in followers on Instagram”.

One way to think about it is to set ‘SMART’ goals: Specific, Measurable, Achievable, Realistic, and Time-sensitive. If work toward these goals is not specific and measurable, it’s difficult to make meaningful steps and changes to achieve them. 

Deadlines are also often overlooked. It’s hard to achieve a goal if there’s no timeline in mind. Making goals time-sensitive helps motivate teams, and it also helps teams plan their budgets accordingly.

Key Performance Indicators (KPIs)

When determining the goals of your content marketing plan, it can be helpful to set Key Performance Indicators (KPIs) to help you measure your progress and attain your goals. A few measures that you might consider tracking are:

  • Organic traffic
  • Conversion rate
  • Social shares
  • Number of leads
  • Sales growth
  • Keyword ranking
  • Churn rate

Set achievable goals on what metrics you want to achieve before you move forward with creating a content marketing plan. 

Each metric has a particular purpose you should consider. There are three main KPI types: financial, social, and performance.

Financial metrics like revenue and customer value help you understand how well your marketing is earning your business money. Social KPIs such as post likes and followers help you understand your reach and engagement with audiences. Performance metrics like search ranking are important for understanding how well your marketing has driven people to your website.

2. Research Beforehand: Competitors, Keywords, and Audience

To get started, study your corner of the world. There are three major factors that you can investigate to help you develop your content marketing plan: competitors, keywords, and your audience.

Study Your Audience

It can be tempting to create content that attempts to appeal to everyone to reach the most people. However, this isn’t the greatest strategy. You might reach more people, but it won’t be as impactful. It will be better for your business, in the long run, to narrow your focus to the people who really matter: a more specific target audience. Creating actionable marketing personas can help you better reach your audiences.

Consider who your audience is. Put yourselves in their shoes and imagine why they would want to buy your product or service. Think about their occupations, income, interests, and especially how they use technology. Use this information to better tailor your content toward your audience. Once you have a good idea of your audience’s interests, you’ll be one step closer to launching your marketing!

Study Your Competitors

Studying your competitors is another potential avenue for refining your content marketing plan. If your competitors are successful, think about how they are reaching their audience.

Think about what platforms they are using. Identify any particular strategies they are using to communicate and engage with their audience. You can’t copy them word for word, but you can take cues from other businesses to help you develop your own unique strategy.

Search Engine Optimization

Perhaps just as important as the other two subjects of study, understanding how you can take advantage of search engines for growth is critical to your success.

Not only should you be looking into opportunities to take advantage of search engines with relevant keywords in your content, but you should also be looking to take advantage of social media platform algorithms to suggest your content to your audience.

Organic search is one of the most important funnels where your audience can find your content. However, to take advantage of it, utilizing principles of search engine optimization is essential. Optimizing your hashtags and enhancing your content are the keys to success.

3. Audit Your Existing Content

Learning from your mistakes in previous marketing campaigns will help you develop better strategies. It’s also helpful to look back and see what worked well in the past. What you did could be amplified to be more successful.

Think about what can be reworked about your previous content. For example, consider if there are any gaps you can fill to make it more successful. This will also help you decide what you shouldn’t use in the future. Think carefully about exactly why it is that your previous content wasn’t as successful, and consider what you can do to prevent that from happening again in the future.

SWOT Analysis

A popular method of looking inward is the SWOT Analysis. This stands for Strengths, Weaknesses, Opportunities, and Threats.

Identify the most and least successful parts of your previous marketing campaigns. Then, consider what opportunities may be available for your business to take advantage of. Finally, understand what threats you face, whether they be the advantages that competitors have or other challenges that you face. 

Understanding these aspects is important for creating a successful content marketing plan for your business. It also helps you build upon what you already have done instead of forcing you to start from nothing.

4. Create Your Budget and Determine Your Necessary Resources

Now that you understand your goals, your audience, and what you can do to improve, it’s time to set your budget! This is by far one of the most important steps you should consider before you start writing. Consider the deadlines of your content marketing plan and the scope of the content you’d like to release. Contemplate some of these questions to guide your allocation of budget:

  • What will it cost to create and distribute that content? 
  • Are there any other marketing costs that you should consider? 
  • Are you producing this content internally, or are you planning to outsource it to freelancers? 
  • How much money do you have per month, quarter, or year to spend on content?

Although you can build your plan based on high-quality research, you won’t be able to anticipate everything. You may not make as much money as you expected, and unforeseen consequences and events can get in the way. 

Creating a budget for your content marketing plan is all about assessing risk. Knowing how much money you have to work with is important.

You can choose to allocate more funds to each step of the plan to compensate for the unexpected, or you can trim it down a bit and risk losing money in favor of greater gains. Assessing the risk will be different for every business and every campaign, so it’s up to you to decide what will be the best option. 

5. Time to Create Your Calendar

Now that you’ve researched your competitors, audience, and keywords, and set your budget, you’re ready to create a content marketing calendar! This is very important for keeping your projects organized and for staying on budget. A lack of clear deadlines can cause you to go over budget easily. 

Clear deadlines are helpful, but being agile is just as important. In case something takes you by surprise, be prepared to shift due dates and events around to adapt to changes. Don’t procrastinate by putting off due dates for too long, but be prepared to shift gears in case something comes up. 

Another important element to consider adding to your calendar is delegation. Who will be completing each task of your plan? Note down who will be completing each task. This will make it easier to stay organized and get things done as your strategy plays out. 

Consider how frequently you would like to publish content for your audience. It may be once a week, once per day, or something else. It’s up to you to decide what’s appropriate for your audience and your budget. Think carefully as well about how frequently you’ll post on different platforms.

Your research from before should help you better understand how much you should post and how often. There are times when your audience is more active on some social media sites, and these may be the best times to release your content for them to see. This will help set you up for further success. 

For example, we found that the best time of the day for engagement on Instagram is around 1:00 AM EST. Investigate each social site you plan to post on to find the moments that are right for you and your niche.

A content marketing planner like Tailwind can help you better organize your schedule. For most social media platforms, you can even schedule your content in bulk to release it at specific times!

6. Create Content

The next step after creating a clear budget and schedule of events for your content marketing plan is to create the content you want to post. Don’t forget all the research and preparation you’ve undergone up until this point. Consider what images you’ll need to support your content release efforts. Have content planned for every event on your calendar.

Remember, creating content in advance is better than making it the day before. It’s easy to schedule content for social media sites like Pinterest. Often you can schedule content for free!

You’ll want to make sure that your content is optimized for the platform you’re working with. For example, Instagram is better suited for images and videos instead of text content. More specifically, Instagram photos and videos have aspect ratios that work best for the platform. These are video sizes that work best for viewing on vertical mobile devices. On the other hand, YouTube videos are typically meant for widescreen devices.

However, when posting on social media, it can be helpful to have cross-platform content. For example, you may want to share one photo across both Twitter and Instagram. However, both platforms have different preferred image sizes. To get around this, you’ll want to format each image for its intended platform through cropping and other editing.

Sometimes ideas can be hard to come by. Cross-platform content posting can also be tedious. Thankfully, there are many tools out there like Tailwind’s creative tools that can help you create optimized content easily that’s already optimized for the platform of your choice.

7. Begin Publishing and Promoting Your New Content

With all this new content, it’s time to get it out in the wild according to your schedule! However, sitting on all of this content won’t do any good unless you publish and promote it effectively according to your content marketing plan.

A good principle to follow is cross-platform promotion. If you release a blog post on your website, talk about it on social media. If you have an important social media campaign that’s ongoing, talk about it on your blog.

When readers see news about your brand on more than one platform, it helps contribute to your brand recognition and consistency of that brand.

Remember to be careful about deadlines. Publish content on time when possible. If you need to shift things around due to delays or other unforeseen circumstances, be thorough. If you have already scheduled content to be posted, remember to edit the dates so that content isn’t released too soon. Communicate with your audience if they are anticipating content releases and you need a bit more time. They will appreciate your transparency.

8. Track Your Progress and Refine Your Planning

Watch your progress carefully by keeping track of your content marketing plan’s performance. As you go along, consider how close you are to achieving your goal.

This is why it’s important that your goals be quantifiable and measurable. Think back to the KPIs you set during the goal-setting stage.

Create graphs and other tools to help you understand your change from the beginning of your campaign to where you are now. This will help you get a deeper understanding of what’s working and what isn’t. 

At each step of your plan you can understand exactly how far you are from reaching your goals. If your content is performing as well as you had hoped, think about what might have gone wrong. Consider the following questions to get to the root of the problem:

  • What can you do to improve? 
  • Do you need to pivot and rethink your strategy? 
  • What’s working well for you that you think you can expand upon?

Agility is important in any content marketing plan. Every marketer needs to be prepared in case things do not go as planned. One of the best ways to measure your progress is to use an analytics tool like Tailwind to measure your progress across multiple social media platforms.

Wrapping Up Our Content Planning Guide

Without direction, marketing is made a million times harder. However, content marketing planning can elevate businesses and help them achieve their goals more effectively. It requires a deeper understanding of an organization’s audience and market. Studying that audience and one’s own marketing performance is important for success.

Remember that this process is a cycle. It never stops at just one content marketing plan. Over the course of your campaign and at the end of your plan consider how things went and how they’re going. Think about how you can do better next time. That will help you create new strategies and generate new content in the future.

Tailwind’s content marketing tools can help take your business to the next level. Its tools are focused on helping small businesses like yours thrive! There are a number of innovative tools that marketers can use for free to help schedule, create, and optimize their content for their audience. We’re looking forward to seeing your content reach new heights! 

Learn to craft a well-organized marketing plan with Tailwind’s total guide! From planning to implementing and tracking, we’ve got you covered!