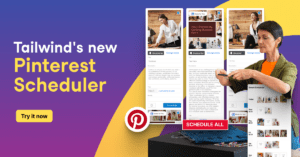
How to Write a Blog Post in Less than 3 Minutes with Ghostwriter

With fast-paced news cycles, constantly-evolving technology, and instantaneous social media platforms, you might be wondering, is blogging still relevant? Absolutely! (You’re here reading this, right?!) Despite the influx of new platforms, tools, and tactics, blogging continues to be an effective marketing strategy for businesses of all sizes. Blogging helps boost visibility, engagement, credibility, and trust. And this drives sales.

How to Schedule Pins to Pinterest – For Free

Are you taking advantage of the traffic-boosting power of Pinterest? Are you saving new content regularly, sharing Pins that engage your followers, and remaining consistent to boot? Have you been doing this manually – one Pin at a time – on Pinterest at all hours of the day or night?

If so, major kudos to you. And also – good news! You don’t need to do this anymore. Pinterest has introduced a 100%-free Pin scheduler right inside their app – and it works on desktop or mobile.

Granted, scheduling Pins through the Pinterest app has its limitations. Pinterest only allows Pinterest business accounts to schedule and limits scheduling to up to 2 weeks in advance. For more flexibility, we recommend Tailwind’s Free Forever Plan, so you can plan, create and schedule your Pins at the best possible times!

If you want the freedom to schedule up to a month in advance for either personal or business Pinterest accounts, we recommend using Tailwind’s Free Forever plan. Need even more Pins, Communities, and graphics? Snag one of Tailwind’s paid packages.

Now, lets walk through how you can schedule Pins to Pinterest for free.


How to Schedule Posts to Pinterest

But how do you schedule posts to Pinterest, you ask? Let’s get into it!

There are multiple ways to schedule Pins to Pinterest. The best Pinterest scheduler really depends on you and your brand! There are multiple options, and we’ll cover them all here.

Pinterest Pin Scheduler

Here’s the scoop: from desktop or iOS or Android on a Pinterest business account you can save up to 100 Pins up to 2 weeks in advance. That’s it. No bells, no whistles, no editing previously scheduled content – but hey, it works!

Steps to Schedule Using Pinterest

  1. Click on the Create button on the top left nav bar.
  2. Choose the “Create Pin” option from the drop-down menu.

3. Upload your image and fill in your Pin’s title, description, and destination website (your URL).

4. Click on “Publish at a later date” underneath your URL.
5. Schedule a date and time up to two weeks away. You’ll want to schedule at the best times for you – the times when your followers are most likely to be on Pinterest and engaged.

Pros of using Pinterest to Schedule Pins

  • You already know your way around Pinterest
  • You can have up to 100 Pins scheduled at one time
  • It’s free!

Cons of using Pinterest to Schedule Pins

  • You’re required to have a Pinterest business account to schedule Pins
  • You can only schedule up to 2 weeks in advance
  • You can only schedule one Pin at a time
  • You can’t schedule more than 100 Pins ahead
  • Once they’re scheduled you can’t edit them (but you can delete them!)

How to See Your Scheduled Pins on Pinterest

Just head over to your profile and click on “Pins” to see the Pins you’ve scheduled. You won’t be able to edit them, but you can click on them, then delete them or choose to have them sent out immediately.


Using a Pinterest Pin Scheduling Tool

If you are a company that either uses Pinterest often or intends to use it often in the future, you may find that Pinterest’s scheduler doesn’t quite meet your needs.

Sure, it’s great not having to manually Pin every day, or several times a day. But at a certain point, you’ll likely find it’s worth it to invest in time-saving, results-building features.

So let’s get into another option – the Pinterest scheduler tool in the Tailwind marketing suite!

Steps to Scheduling a Pin with Tailwind

  1. Log in to your Tailwind dashboard
  2. Select Create Designs to be taken to Tailwind Create, our social media graphics design tool, or Upload Media you already have ready for your Pin!
  3. Select the Pinterest account you want to schedule your Pin to from the dropdown list.

4. Check your uploaded image and then select Confirm.

5. Add your Pin Title, Pin Description, and Pin URL. OR, if you need a little help with your Pin Description, click “Ghostwrite For Me” at the top of the screen.

Our AI Pin description tool will ask for your URL, what you’re posting about, your title, any keywords or phrases you’d like to add, and your CTA. Then, it will generate 3 possible Pin description options for you!

Make your tweaks or click “Save Description” to save your new Pin description.

6. Underneath your Pin description, select the Pinterest board you want to send your new Pin to by typing in the board name or searching through the drop-down list!

7. Next, decide when to post your Pin! Our SmartSchedule tool will make recommendations based on the times your audience is most active and engaged on Pinterest. Or, you can choose a custom time by clicking the clock icon below!

Once you have selected your posting time, click Save for Later to save your new Pin in your drafts, or click Schedule Post to send it to your calendar!

How to See Your Scheduled Pins on Tailwind

You can view your scheduled Pins at any time on the calendar on your home screen! Just look at the date of your scheduled Pin to see a preview.

Hover over the tile to see an expanded view of your Pin, where you can edit, unschedule your Pin or even delete it at any time.

Pros of Using a Pinterest Scheduling Tool

Cons of Using a Pinterest Scheduling Tool


Conclusion: How to Schedule Pins to Pinterest

Pinterest has a great free tool for scheduling Pins. It’s limited in features and in the number of Pins you can schedule, but it’s a great way to try it out and see what scheduling can do for your Pinterest marketing – and for your calendar! For even more time-saving and advanced features, try out our forever-free plan to take your Pinterest marketing to the next level!

FAQs

How to Post Seamless Instagram Carousels with Tailwind to Boost Engagement

It’s finally here! 

If you’ve been looking for a seamless Instagram carousel app that will allow you to pre-plan and share photos in ‘Multiple Image’ posts on Instagram, your search is over! 

Instagram users can now use Tailwind to plan, schedule, and post multiple images or videos in a single post! But that is not all, we will also do all the heavy lifting for you. Instead of manually uploading your posts, you can now use Tailwind to automatically post Instagram carousels for you!

Tailwind’s carousel tool is available on desktop and mobile.

So, it functions as a mobile carousel app for Instagram, as well as an Instagram carousel scheduler for Mac and PC. 

Ready to get started? This blog post will walk you through step by step.

[sc name=”autopost-carousels-cta-skinny”]

1. Create New Post 

Tailwind’s Instagram carousel scheduler allows you to easily create new draft posts by uploading photos from your computer. 

Just open your Tailwind dashboard, and look for the “Working from scratch?” box. Here you’ll see Create Designs, and Upload Media.

With Create Designs, you can use our post creation tool to design stunning social media posts branded with your unique colors and fonts.

Or, you can upload photos from your computer! Here’s what to do:

  • Click Upload Media
  • Select Carousel Post
  • Upload Your Content!

2. Add Multiple Images to Your Instagram Carousel Post

From there, you will be able to select one or more photos or videos to upload from your computer, which will be converted into a carousel post.

It’s like an automatic Carousel photo app!

Once your post is in the editing stage, you will have the option to click “Add More” to add more images to your Instagram post. 

You can add up to 10 images or videos per Instagram post.

3. How to Edit Carousel Post Images 

Once you have your images uploaded, you can drag and drop them to change the order. 

The order on your screen is the order that the carousel that will appear on Instagram.

When users on Instagram swipe right, they’ll be taken forward through your carousel post.

When users on Instagram swipe left, they’ll be able to go back through the images on your carousel post.

If you’re wondering how to delete one picture from an Instagram carousel, just hover over the image you want to delete. A trash can icon will appear in the top right corner!

Be sure to Confirm your Instagram carousel before moving on to the caption so you don’t lose your progress!

Psst… Make sure to double-check everything before moving on as you can’t edit Instagram carousel post photos once they’re live!

4. Write Your Carousel Post Caption for Instagram

Now you’re ready to write a caption for the Instagram carousel you’ve just created. You can ‘make it yours by changing the font, adding spaces and line breaks, and adding emojis to your Instagram caption!

5. Add Hashtags to Your Caption

Don’t forget the hashtags! Tailwind’s Hashtag Finder will populate Hashtag suggestions based on your caption text as you’re typing.

Or, you can use saved hashtags from one of your saved hashtag lists.

Looking for something specific? Start typing a hashtag. You’ll see hashtag options populate, with color-coded popularity and the number of posts with that hashtag attached!

6. Select Your Post Method

Next, you’ll select your post method! You have two options: Auto Post, and Post reminder.

Tailwind can auto-post your carousel for you at your scheduled time, no follow-up required!

Auto posting features only work with Instagram business accounts, but don’t worry.

If you don’t have an Instagram business account, you can either switch over (it’s free and really easy!) to get the most out of Tailwind features, OR, Tailwind can send a post reminder to your phone when the time comes for your post, with the assets you need!

7. Schedule Your Instagram Carousel For the Best Time

Next, it’s time to schedule your Instagram carousel. Tailwind’s Smart Schedule will find the best times to post when your audience is most active on Instagram.

And, if you want to double-check what your feed will look like with a new post, scroll down to the Preview Your Grid section. This will show you your currently scheduled drafts and published posts, so you can get a look at what all your hard work looks like together!

Be sure to press the blue “Schedule post” button at the bottom once you’ve decided on a time.

[sc name=”skinny-cta-manage-your-instagram-profile”]

8. Post Your Carousel!

Your carousel is scheduled! If you have an Instagram Business account, there’s nothing else you need to do. Instagram Auto Posting is included in your Tailwind plan!

If you don’t have a business account OR selected push notification, keep an eye on your phone! At the scheduled time you selected, you’ll receive a push notification with your Instagram carousel images and saved captions to post directly to Instagram.

Use Tailwind to Schedule Your Carousel Post on Instagram

There you have it- just a few simple steps to creating Carousel posts on Instagram- without having to dedicate time to it every day. 

But being a carousel app for Instagram isn’t the only✨magic ✨Tailwind for Instagram is capable of. It’s easy and efficient to plan and schedule all your Instagram images, Instagram videos, and Instagram stories for the whole week using Tailwind’s Instagram planner.

The Tailwind blog is here for all of your planning and more tips on posting on Instagram to help you learn more about how to attract followers, grow your account, and drive sales from Instagram!

Be sure to check it out if you haven’t already! 

Pin Me For Later :

FAQs

What are the benefits to Instagram carousel posts?

Especially if you are a small business with products you want to show off, the carousel function can help you get more images in front of your followers in a more dynamic way! It offers you the opportunity to show off details, variety, and even the story behind the product.

Can you edit Instagram carousels?

Yes! As of November 2021, Instagram allows for the editing of your carousel posts. Once you have your images uploaded, you can drag and drop them to change the order. For more on editing your IG posts and carousel images, check out our in-depth blog!

What are the best sizes for Instagram carousel?

  • Instagram Video Carousel: 600px x 600px
  • Landscape: 1080 x 566 pixels
  • Square: 1080 x 1080 pixels
  • Portrait: 1080 x 1350

Do Instagram carousels raise engagement?

Carousels have been found to be one of the best ways to engage with your followers on Instagram! On average accounts that use carousels receive higher engagement compared to traditional posting.

How to Hide Hashtags on Instagram (4 Hashtag Hacks!)

Did you know that Instagram marketers who use nine or more hashtags per post get more than 2.5x the engagement of those who only use one hashtag?

Without a doubt, hashtags are critical to building followers and engagement and contribute to your entire marketing strategy. However, they can make your feed look unappealing and spammy.

So how do you keep your Instagram feed pretty and clutter-free? EASY! After finding the perfect set of hashtags for your post, learn how to hide hashtags with one of the four simple methods below.

Should You Hide Instagram Hashtags?

There’s no harm in hiding your Instagram hashtags to neaten things up. Whether you put your hashtags in your caption directly or move them to the first comment, your content will still appear in hashtag discover feeds if relevant to the hashtag topic.

So, there is no need for concern as you’re pondering how to lower your hashtags on Instagram. It’s just a matter of choosing the right method for you!

Which one works better, Caption or Comment?

We understand that looks are not everything; sometimes, you want to do what is best for your content. So which one is better? Which one gives you more visibility? Our teammates Alisa Meredith and Melissa Megginson took over YouTube to give you answers. Take a look!

Now that you’ve made up your mind, keep reading, we’ll give you some hashtag hacks on how to make the most out of them!

Hashtag Hack #1: Hide Hashtags on Instagram in the First Comment

The cleanest method to hide hashtags on Instagram is by tucking them into the first comment. Just have your list of hashtags ready to go, and add them as a comment after making your post live.

Does this sound too manual for your liking? Tailwind does the work for you!

When you add hashtags to your Instagram caption in Tailwind, you’ll see a checkbox to hide your hashtags in the first comment. This allows you to move your hashtags from the end of your caption to the first comment on the post.

That’s it! No more cluttered captions, no more remembering to return to a post and add your hashtags. Your post is ready for engagement the moment it goes live!

Here’s how to hide Instagram hashtags with Tailwind:

Now, doesn’t that make you look professional!?

Hashtag Hack #2: Use the Instagram Dots Method to Hide Hashtags

One of the classic methods of hiding hashtags is Instagram dots.

This is a cuter way of saying adding a series of periods between the end of your caption and your hashtag list so that they’re hidden beneath the “More” button for your followers.

Here’s how to do it:

  • Type up your caption
  • After the punctuation at the end of your last sentence, make sure there are no spaces. Then hit return
  • On the new line, put one period, and then hit return again
  • Keep repeating until you have plenty of Instagram dots between your caption and your hashtag list
  • Paste in your hashtags and press publish!

It’s really important to make sure that you don’t include any extra spaces at the end of your sentences or after each Instagram dot. If you do, it will cancel out the line break and ruin the effect!

It used to be necessary to type out your caption with the line breaks on a separate word processing app like Notes. But now Instagram allows you to form line breaks in your caption directly through the Instagram app! Just click the “123” at the bottom left of your phone’s keyboard and tap “return” to jump to a new line.

Hashtag Hack #3: Hiding Instagram Hashtags in the Caption

Looking for tips on how to put your hashtags lower on Instagram captions?

There IS a way to put your hashtags in your caption while keeping your posts and feed looking good, and it works similarly to the Instagram dots method.

Simply format your caption so that it adds line breaks, pushing your valuable hashtags into the “more” section of the caption where they still do their job of increasing reach and engagement, but aren’t easy to see!

Remember, take out any extra spaces lingering after the punctuation at the end of your line breaks. It also includes after emojis in your captions!

As with the dots method, you can type out the caption with the line breaks directly on Instagram now. But just remember that any hidden spaces will cancel the line break.

This Instagram post from @harpermaven is too pretty be covered in hashtags! See how her formatting moves them below view?

Did you know? You can also compose captions with hidden hashtags in Tailwind! Just copy and paste in your caption and formatting, and then use Hashtag Finder to find the best hashtags for your Instagram post. 

Here’s a Tailwind hack that makes this incredibly simple and quick:

Use Tailwind’s Instagram Hashtag Lists to Hide Your Hashtags

Tailwind’s Hashtag Lists make hiding hashtags on Instagram captions unbelievably easy.

From Tailwind’s Instagram publisher, create a “Hashtag” list which in this case will actually store ONLY your formatting:

  1. In the Tailwind Instagram Publisher, click on the “#” button
  2. Now click the  “+” button. I called mine, “formatting.”
  3. Add line breaks and characters, symbols, or emojis on each line. In this hashtag list, I included a camera emoji, and then double asterisks, each on their own line. This will add a camera emoji to the end of my caption and then insert line breaks with asterisks on them to move my hashtags down and out of view!

The important thing to note is that you need to have SOMETHING on those lines in order to sustain the line break for publishing. You could use a dash, some ellipses, or an emoji, but make sure there is nothing else on that line (no spaces following the characters) or the line breaks will disappear when you post to Instagram, even if it looks fine in the Instagram scheduler.

Now you have a handy template that will save you time every time you schedule a post – AND keep those hashtags out of sight!

Type your caption, add your “hashtag” list plus hashtag recommendations or your premade hashtag list, and post!

Hashtag Hack #4: Add Conversational Hashtags in Your Caption, Hide the Rest

Here’s a method on how to hide Instagram hashtags that make your post look spammy but keep the ones that create fun conversation.

Hashtags have been around so long that sometimes it just makes sense – and can feel a bit playful – to include them in the conversation!

With Tailwind’s Hashtag in first comment feature, only the hashtags at the END of your caption will be moved to the first comment.

So, go ahead and include some in the caption just for fun.

Hashtag Hack #5: Use Tailwind to Find, Hide Hashtags & Schedule Instagram Posts!

When it comes to hiding Instagram hashtags, do you prefer to put them in your caption or first comment – or a bit of both?

Now that you know how to hide hashtags on Instagram, grab a free trial of Tailwind for Instagram.

Pin It for Later :

How to Change Fonts on Instagram (Captions + Bio)

Change Instagram font options in Tailwind on Purple background

Do you feel like your Instagram captions lack a little something these days?

Wish there was a way to quickly grab your reader’s attention OR help them skim your caption copy for the main points?

Great news – there is, and the secret is a quick Instagram font change!

Let’s take a look at how some of our favorite Instagrammers are making the most of different fonts for Instagram in their captions – and how you can put our new Instagram font changer tool to work!

What Font Does Instagram Use?

Curious what the signature Instagram text font is? This Sans Serif typeface is the immensely popular Proxima Nova, created by Mark Simonson in 2005.

If it looks familiar, it probably is. Proxima Nova is the most popular commercial font on the web and can be found on thousands of websites.

Where Do Those Cool Fonts for Instagram Come From?

If you’ve poked around at all while trying to change your font on Instagram, you’ve probably noticed there aren’t other fonts readily available on the platform. 

And if you’ve spied cursive fonts or funky bubble letters across tons of profiles, you may be already clued in that the types of Instagram fonts you can actually use are limited.

The reason for this is simply that they’re not other fonts at all. 

The stylistic letters and symbols you’re seeing in Instagram captions and bios are actually Unicode characters. 

Poke around Insert Symbols or Special Characters in a word processor doc, and chances are you’ll come across part of or all of the thousands of unique symbols in Unicode.

We won’t dive into the technical specifics here, but suffice it to say, some of these symbols (and in some cases, entire alphabets) can be used in your Instagram bio or caption for a unique look!

One example of supported Unicode symbols that can be used for Instagram font options are:

  • Ⓑⓤⓑⓑⓛⓔ ⓛⓔⓣⓣⓔⓡⓢ

There are also tons of ϝαɳƈყ ıŋʂɬąɠཞąɱ ₣Ø₦₮ [̲̅o][̲̅p][̲̅t][̲̅i][̲̅o][̲̅n][̲̅s] if you know where to look (don’t worry -we’ll help!)

How to Get Different Fonts On Instagram 

You can use these different fonts on Instagram in a few different places, including in your Instagram captions, your Instagram bio and in your Instagram Stories!

We’ll walk you through how to change each below:

How to Change Fonts on Instagram Posts

You can grab any type of Instagram font you want to use in your caption from an Instagram font generator tool like LingoJam. Simply type in the phrase you want to display in a unique font and copy and paste it into our caption!

A word of caution here: a lot of fancy Instagram fonts are hard to read – especially in a long caption. 

That’s why our Tailwind caption font formatting tool gives you four style options that are the easiest to read on the platform while still making your caption uniquely yours!

Here’s how to get different fonts on Instagram with Tailwind’s Instagram planning tool:

  1. Log in to Tailwind for Instagram on your desktop 
  2. Upload your post photo, OR select an existing photo you want to edit!
  3. Begin typing your caption
  4. Select from the different fonts for Instagram in the pop-up. You can choose Serif, Cursive, Bold and Italic.

You can also combine some styles together, such as Bold + Italic, Bold + Cursive, and even Bold, Italic + Times New Roman for all kinds of fancy letters.

You’re not limited to one style for your entire caption, either! You can use any style in any part of your caption except Hashtags. Just click the different fonts you’d like to use on Instagram as you’re typing!

See? We told you it was the easiest way to change your font – no pesky generator or Instagram caption formatting web tool required.

How to Change Instagram Bio Fonts

The Instagram bio is definitely the place where unique Instagram fonts shine. If you’re wondering how to change the font in your Instagram bio, it’s really easy – especially with the feature built into Tailwind’s Instagram scheduling tool!

You’ll need to change the font on your Instagram bio via desktop. It takes just two steps:

Step One: Open Tailwind For Instagram on Desktop

To get different fonts on Instagram, you’ll need to work in an existing draft – or upload a new post to get started.

Now open your draft and type the message you want to put in your Instagram bio (in the font of your choice!)

Once you’ve formatted your new font change for Instagram bio to perfection, select the stylish text you’ve typed and hit copy (Command + C/ Control + C)!

Step Two: Open Instagram for Desktop to Update Your Bio

The secret to how to change Instagram fonts in your bio is really as simple as a quick copy and paste! Once you’re in the Instagram app for desktop, head over to your Instagram Profile >Edit Profile.

Drop your newly-minted Instagram bio font into the Bio textbox. You can do one sentence, or the whole thing!

Just remember that you’ll have to type the complete text in our caption formatting tool to paste into this section.

Once your bio is updated with new Insta fonts, click Submit and check it out!

Pro Tip: If you want to format your Instagram bio with spaces and line breaks to work on Instagram, make sure you remove any extra spaces after emojis, text symbols, and punctuation marks.

Even one extra space at the end of a line cancels out your line spacing!

How to Get Different Fonts on Instagram Story

You can also use the same copy and paste trick from an Instagram font generator (or Tailwind) to add different fonts to your Instagram Stories!

Simply choose the font you want to use, copy, and paste it into your Stories.

Or, you could use the new fonts on Instagram Stories! The new font choices have been rolling out to accounts over the past year, and expand the original four font choices to nine. Check them out!

You can change your fonts by opening a Story to create, tapping the text button in the top right corner, and scrolling through the available fonts.

How to Use Instagram Font Change For Sales + Engagement

Besides being totally cool, different Instagram text fonts serve a purpose in your Instagram strategy. In fact, new Instagram font styles can help make your great Instagram captions get more sales!

Want to see how? Here’s some of our favorite uses for different Instagram fonts:

1.Tease Main Points with Different Instagram Fonts 

When users are scrolling mindlessly through Instagram, they’re less likely to stop and click on every caption to read it.

After all, they know there’s another post coming up next!

To capture attention quickly, you have to stop the scroll with an Instagram caption that stands out.

For example, Molly has placed a powerful call-to-action in eye-catching Instagram font exactly where it’ll appear in the feed (only about 35 characters appear before someone has to click read more.). 

Bold the first line of your caption with an eye-grabbing question or statement.

Then bold select keywords throughout your copy to help skimmers get the gist quickly and decide to engage!

2.Bold Key Words That Trigger Strong Reactions

This is a handy psychological trick that plays into evoking strong emotion – all with the use of an Instagram font change! 

Try bolding or adding different fonts for Instagram to select keywords and phrases that will trigger emotion or action.

A great example is something like ⚡️FLASH SALE! ⚡️

3. Highlight Your Events with Instagram Font Changes

Anxious to get attendees to buy tickets on Instagram for your latest event or promotion?

Try bolding the most relevant information so it jumps out at casual browsers.

By bolding the who, when, and where’s, your readers are more likely to check their calendars and figure out if they can attend the event.

If they can, they’ve already achieved that “mental buy-in” they’ll need to keep reading and sign up! 

If they can’t, you’ll save yourself that disappointment that could damage your follower relationship by making them jump through hoops only to find out they can’t attend the event. 

4. Use Instagram Cursive Font In Short Captions

These fancy characters are best used sparingly. If you’ve ever seen a full paragraph of Instagram cursive font, it’s tough to read. So how do you write in cursive on Instagram in a way that won’t overwhelm your followers?

Keep it simple: Choose short but impactful sentences and phrases in your caption and change the Instagram font to cursive.

In fact, this is a great font to use for one-sentence captions or a dreamy song lyric!

5. Mix and Match Different Instagram Fonts for High Impact Captions

If you have multiple CTAs or actions your followers can take from your post, try highlighting them throughout your caption in different fonts.

For example, Download now, Click Get Tickets on my profile, or Questions? Tap the Contact Button!

Conclusion: How to Change Instagram Font on Your Captions + Bio

Before now, using different fonts for Instagram was kind of a headache. Any time you longed to format Instagram copy with bolds, italics or that awesome fancy cursive, you’d have to use copy and paste fonts from web text generators.

While an Instagram font generator isn’t hard to use, it’s just one more step to include in your social media planning…and who needs ANOTHER step?

That’s why Tailwind’s built-in caption font formatting is such a time-saver for Instagram marketers!

With our latest feature, you can quickly customize your Instagram caption fonts. It’s officially the easiest way to change Instagram font and style – all in one screen!

And the best part is, after you’ve finished perfecting your Instagram caption (complete with your new fancy text), you can schedule your post in one click with our Instagram publishing tool.

So what are you waiting for? Get in there and start formatting.

And if you’ve never used Tailwind for Instagram before, click the box below for a free trail of Tailwind for Instagram.

FAQs: How to Change Fonts on Instagram

Pin Me For Later :

Tired of using Instagram font generators to spice up your posts? We've got the easiest solution ever for changing Instagram fonts - right in your caption!

How to Cross-post on Social Media

Have you ever spent a chunk of time making content for one social media platform that turned out so good, you wanted to share it on your other accounts?

Well, luckily that’s something you can do through one simple marketing tactic: cross-posting. 

What is cross-posting on social media? It’s posting the same or similar content across more than one channel.

Social media managers and strategists cross-post content to make the most of their time and resources. If you have something to say on all of your channels, why not repurpose the same picture, video, or caption on each?

And you know what the best part is? There are cross-posting apps to make it way easier than learning how to tie your shoes. 

(As a mother of two children, you can trust me on that one. )

For example, Tailwind has cross-posting features which we’ll get into below. 

In this article, we’ll be going over everything you need to know to be a cross-posting pro. Let’s get to it, shall we?

And psst… If you’re wondering which social apps your business should be on, we have an article that’ll blow your socks off! 

Which Social Media Platforms Are Best for My Business

Opportunities of Cross-posting

While cross-posting essentially allows you to repurpose content across multiple channels while keeping your accounts up-to-date, it has several additional advantages. 

For example, cross-posting can increase your reach efficiency and give your business access to a broader demographic.

Curious about the pros and cons of repurposing content? The next section will break down why you should be cross-posting on social media, and how to avoid feeling spammy.

Cost-Effective

Instead of investing in several different forms of media, you can niche down (especially at the beginning of your social media journey), and produce a specific type of great content that you share on all of your profiles. 

So instead of focusing on videos, blog posts, witty captions, and Lives, you can pick one thing and do it really well. This can allow you to build a strong foundation and not go overboard hiring photographers, videographers, SEO specialists, etc. 

Whatever you’re best at, do that and share it everywhere!

Time Efficiency

If you’re a busy business owner or social media manager for a company, you wear lots of hats and probably don’t have a ton of time. 

Cross-posting allows you to create one piece of content and then share it on several channels. This can save you from making one great piece of content and four mediocre ones. 

Instead, lean into that incredible piece, and repurpose it by tweaking a few words!

[sc name=”michelle-burke-quote”]

Further Reach/Visibility

Each app has different demographics and algorithms, meaning your fantastic piece of content has a much greater chance of reaching new people if it is shared on other platforms. People generally have strong preferences for one or a couple of apps. It could be Facebook, Instagram, Twitter, Tik Tok, LinkedIn, etc. 

The more you’re on, the better chance you can reach more people.

Increase in Engagement and Followers

Sharing across multiple platforms doesn’t just allow you to reach more people, but it can snowball your following much quicker. 

When you are on multiple apps and provide links to your other accounts, the people who like your business will likely give your other accounts a follow. 

As mentioned above, this gives you a chance to grow rapidly as each app works together to build your following. 

Now that we’ve talked about the perks, are there any disadvantages?

Obstacles of Cross-Posting

Okay, I love a good opportunity to repurpose. But to be fair, I have to mention the potential downsides too. 

While saving time and snagging some shortcuts is about all a social media manager or business owner can do in this harsh capitalistic climate, cross-posting can look redundant and lower engagement.

The redundancy can lose follower engagement

Redundancy can quickly lose your followers’ interest if they follow you on multiple channels. And if they’ve already seen the same content on another platform, they’re less likely to engage when they see it again. 

Too much repurposing can also give your brand the feeling that it doesn’t have a unique personality.

Not all content is compatible with each platform

As I mentioned earlier, each app has its own demographics and algorithm. So while one piece of content may do well on one app, it might not be as successful on another. For example, LinkedIn is best for educational content. While with Instagram, the quality of aesthetics is crucial. 

You can combat that by making quality content that will be attractive on all platforms and creating and sharing unique content, so it’s not ALL repurposed. 

Lastly, by giving your content a few different tweaks between platforms, you can appear less robotic and give each forum its voice and personality. 

This brings us to the next section.

Before cross-posting, consider the distinctions between platforms

Each app has rules of its own, from different image sizes to character limits and algorithms. The various social media platforms have their preferred content type and typical age demographics. 

For example, Tik Tik is excellent marketing for the Gen Z generation, while millennials are primarily on Instagram and Twitter. 

So while cross-posting has all those perks we just talked about, there are a few other factors to consider, which we’ll get into in greater detail next!

Optimal Posting Time

Generally, the best time for you to post on each app is when your audience on that particular platform is most active. 

So when cross-posting, it’s essential to consider what time you’re posting. The specific time you post will have a significant impact on how many people see your content or not. 

Luckily Tailwind tracks these analytics for you and will automatically publish your posts during your audience’s peak engagement time. 

No need to set that alarm on your phone; download Tailwind, schedule your posts, and you’re all good to go.

Character Limits

All the platforms have a different character limit, so each post will need to be slightly rephrased. While Facebook has an astounding 63,206 character limit, Twitter’s is only 280 characters

As you can see, the number of words you can say vastly varies from app to app. 

The best way to get around this? Write the longest caption first, then cut and tweak it for the smaller character limits!.

Image Dimensions 

Not only is the character count different, but so are the image dimensions. And to further complicate things, different types of content on each app have different dimensions.  

Instagram has several dimensions for different types of posts! Image dimensions are the rules that never end…(They just go on and on my frieeeend! )

Want to learn more about the image dimensions on different apps? We have blog posts on just that for Facebook image sizes, Instagram image sizes, and Pinterest Image Sizes.

Hashtags

Hashtags perform much differently on different apps. While one may be trending on Twitter, it could be over-saturated and outdated on Instagram. 

While it can be easy to copy and paste hashtags between apps, one area that greatly benefits from some TLC is customized hashtags.

 If you don’t want to spend time researching hashtags, you’re in luck because Tailwind’s Hashtag Finder does that for you!

How a CTA translates

Each app has its own way of allowing CTAs, and spoiler alert; some apps *cough* Tik Tok, make it harder than others. 

For example, Tik Tok only lets you have one hyper-link if you have 1k followers, but you can’t link directly outside of the app in the videos. It’s almost as if they don’t want you to leave the app. Very suspicious.

Then Instagram allows you to post Link Stickers in your Stories, making clicks to a website or article easy peasy. 

If you’d like to learn more, we have a post about Instagram Link Stickers that’ll you’ll love! 

Facebook allows hyperlinked URLs in the caption, making it easier than ever for people to click a link and be transported to somewhere far, far away on the interweb. 

While all apps give the same benefit of allowing you to share a link, the way of sharing it and making it accessible to your audience is slightly different.

Now that we’ve gone over the key factors to consider before cross-posting let’s go over how to pull it off seamlessly.

Avoid coming off spammy

I mentioned this earlier, but if your posts are the same on all accounts, people who follow you on different platforms could find that spammy. And THAT could result in lowered engagement and loss of followers. 

Want to use the benefit of repurposing content while not appearing spammy? Then buckle up for the best part of the ride because we’re heading there right meow.

How to cross-post on social media effectively

The easiest way to cross-post without social media consuming all of your time (between constantly researching and physically posting throughout the day) is with the help of a social media management tool. 

And I know JUST the one to recommend! Ever heard of an app called Tailwind?

Tailwind allows you to create your posts in the app then schedule them in one place. It also posts during your customized peak engagement window taking the research and guesswork out of posting efficiently. 

Tailwind also gives customized hashtag recommendations based on your captions. And want to know one of my personal favorite perks? Tailwind allows you to see your Instagram and Pinterest feed before posting to make sure it’ll be aesthetically pleasing. 

So while we’ve covered why you should be cross-posting on social media and how to do so, let’s discuss an almost as easy alternative.

When cross-posting is redundant, consider cross-promotion

Cross-promotion is similar to cross-posting; it just has a slightly different approach. 

Cross-promotion on social media is sharing your content to fit each platform’s characteristics and preferences. So it’s less cut and paste.

This type of marketing generally requires more creativity to produce unique posts to promote a form of content you made. Blog posts or paid services are common forms to cross-promote on several channels. 

So instead of sharing a slightly different photo and caption, cross-promotion requires different types of content about the same thing. 

For example, you could have a Reel promoting a new service on Instagram, then share a longer description of your services on Facebook. Different forms of content catered to each app to promote one thing. 

This type of content may involve more labor, but the results bring much more engagement and interest!

While repurposing wouldn’t be an effective social media marketing strategy, it’s a great way to make an announcement or get a lot of value out of your favorite content.

[sc name=”pin-me-tailwind-create-cta”]

Want to repurpose amazing content while remaining authentic? Spoiler alert: cross-posting doesn't have to feel spammy.   Come learn how!

The Complete Guide to Managing Multiple Social Media Accounts

Complete Guide to Managing multiple social media account  header

I’m going to take a wild guess that you’re someone trying to make your dreams come true, and you realize social media plays a part in that. Whether you’re a small business owner or you’re performing research – whatever brings you here, welcome! 

There’s a lot to consider regarding establishing a brand on social media, let alone multiple platforms. Maybe you’re on one platform already and wondering if adding another would be worth the hassle. 

Well, in this post, we’re going to discuss why your brand should be on multiple platforms, how to successfully manage several social media accounts, and provide some tips on developing a strategy. 

Let’s get to it!

The Value of Social Media for Business

Social media marketing can take your business to new heights. Maybe you already know it’s essential, but let’s break down the specific perks social media accounts give a company. 

  • Ability to promote your business (locally, nationally, regionally) affordably.
  • Access to networking with other creators and businesses.
  • PR and reputation building, giving your business a definitive brand.
  • Wider reach of potential customers.
  • Direct increase of sales.

You can learn more about the benefits of social media in our blog post, What is Social Media Management. And for a more business-specific approach, check out our post on How to Use Social Media to Promote a Local Business

While social media, in general, is beneficial to a marketing plan, each platform has its unique ability to reach new customers. This means it’s crucial to have a presence on many apps.

If you want to enter the business ownership arena in 2022, learning how to manage multiple social media accounts is a big part of experiencing success. 

Next, we’re going to back it up one more time and show why you shouldn’t be on just one platform, but many. 

Why You Should Have Multiple Social Media Accounts?

With so many social media platforms, it can be confusing deciding which ones to utilize. Especially considering the strategy on each app is slightly different. It can feel like too much of a bother managing multiple accounts. 

While it may not feel worth the effort to use multiple accounts, I put together a list of 5 reasons a company should manage multiple social media accounts instead of just one. 

  1. Increase visibility and brand awareness: A large part of your potential customers will have a profile on at least one social network. And certain apps resonate with different demographics, so you’re casting a much wider net of potential customers by using multiple accounts. 
  2. Improve the online reputation of your business: Social media is a great place to define your brand’s personality and establish who you are, and each app has its ways to do that. For example, Instagram can showcase videos and behind-the-scenes footage. In contrast, Twitter is a great place to show witty and snappy comments. Each app allows a different type of creativity and connection with your audience.  
  3. Facilitate communication between the company and customers: Social media gives brands a direct communication channel. Customers love how accessible brands are on social media; it helps build trust between the brand and customers.
  4. Promote products or services with different strategies: As mentioned earlier, each social media platform works differently. The preferred content and algorithms vary, giving you more opportunities to reach people in creative ways. And when you manage multiple social media accounts, you can create different marketing strategies to promote your products and services.
  5. Analyze your competitors: Another advantage of social networks for companies is quickly detecting your competitors and studying what does and doesn’t work for them. You can see what content in your niche does well on each app to help guide your strategy. 

It’s a huge advantage to use multiple platforms to reach your audience! So if you’re converted and wondering – “how am I going to add multiple apps to my plate?” well, look no further because the next section is just for you.

Best Tools for Multi Social Media Posting

While there are several social media platforms, there are also several apps that help businesses manage multiple accounts. 

Having a third-party app for posting makes a huge difference and allows you to be consistent on various platforms. And some apps, like Tailwind, also give you the analytics you need to see what’s working on each channel.

Each social media management app has its perks. So how do you pick which one to use for your company? Well, it boils down to what your needs are and which social media apps you’ll be using! 

Next, I will show you some perks of the Tailwind App versus other scheduling apps. 

Let’s take a look at the graphic below.

Complete Guide to Managing multiple social media account graphic

When looking for scheduling and posting apps that can manage all your social in one place, many will do just that, but as you can see, not all have the same benefits as Tailwind! 

With Tailwind, you can create, plan, schedule, post, analyze, strategize, connect, and grow in whole new ways! Tailwind is the only all-in-one app for your social media management needs.

Want to learn more about the best tools to manage social media accounts? We have a post on the must-have tools for small business owners where we go even deeper into this topic. You should check it out.

Now that we’ve established Tailwind can make your social media dreams come true – let’s talk strategy with posting to multiple social media apps. 

 Tips to an Effective Social Media Multiple Posting Strategy

You may need a strategy to see effective growth and sales through social media, but the good news is creating a good plan isn’t that complicated! 

Follow these five steps, and you’ll have everything you need to build a successful strategy through the help of a social media multiple posting app! 

  1. Create a plan for each social media channel: The most significant deciding factor for success has a plan. Even if you’re experimenting with different types of content at first, having a strategy is a solid first step. 
  2. Post regularly: I’d suggest posting more than once a week on any app, but the more consistent you are, the easier apps know where to show your content. Some apps like Twitter and Tik Tok require daily content and interaction, while Instagram and Facebook allow more flexibility. Developing a routine helps you be consistent and predictable to your audience. And it also helps the apps make sure the algorithm begins to see and favor your content.
  3. Use a social media management tool: It can be a lot posting on several channels multiple times a day, but a social media tool like Tailwind App makes the job much easier! Just open the app, create, and schedule a month’s worth of content. Easy peasy. 
  4. A/B test: The A/B test allows you to see what works best between two different things. It’s a great way to experiment with different tones, voices, content, hashtags, and titles. Comparing data allows you to see what performs better to help narrow down your strategy. 
  5. Take advantage of hashtags: Speaking of hashtags, they’re one of the best ways to expand your social media reach organically. When you manage multiple social media accounts, you can measure your efforts and analyze performance by tracking the hashtags that you are using. Not keen on doing hashtag research? Tailwind App has a Hashtag Finder, which researches the best hashtags for each post, depending on its content.

Start reaching different demographics with multiple social media accounts! As you can see, social media management doesn’t have to be a big undertaking, especially with the help of a management app like Tailwind.

Get started with a forever free plan with Tailwind, and start saving yourself the time and hassle of managing multiple accounts today! 

[sc name=”pin-me-tailwind-create-cta”]

Ready to take your reach up several notches?!   Learn how to manage multiple social media platforms and shoot for the stars!

2022 Design Trends for Social Media

Social media for businesses is not simply about selling products or services. It’s also a powerful tool for connection, inspiration, and building relationships! To do this successfully, part of the mission on social media becomes speaking to your audience in a language they understand – and on visual platforms like Instagram and Pinterest, that’s accomplished through design.

Graphic design language evolves year over year, with many trends coming and going, and a select few standing the test of time. The trends that do become popular for a time reflect what people care about most, and by using these elements of graphic design, brands can build recognition and familiarity with their audience!

That’s why we undertook the work of forecasting what’s coming up next in the realms of graphic design and social media design, and translating these trends into ready-to-use, easily customizable template packs, color palettes, font pairings and more in Tailwind Create!

Below, you’ll see the painstaking research the Tailwind team collected from 70+ resources translated into color, patterns and textures, elements and motifs, photography and styling, and typography to use to stay relevant with your social media designs. Enjoy!

2022 Color Trends

Every year as December approaches, designers the world over breathlessly await influential companies like PANTONE and Sherwin-Williams to release the Color of the Year. Palettes, swatches, and mood boards stream from these colors, sparking imagination in home decor, fashion, and graphic design. Here’s what’s coming up this year!

1. The Outdoors Are In  

Blame it on the pandemic, or a desire to be more connected to the outdoors, but this year’s major color trend is all about cool, misty greens and rich clay tones found in nature.

Paint company BEHR announced Breezeway as their color of the year – “A relaxed and uplifting sea glass green expressing peace and tranquility for forward movement.”

Sherwin-Williams and Benjamin Moore were not far behind with Evergreen Fog and October Mist respectively.

Color of the year paint swatches from BEHR, Sherwin-Williams and Benjamin Moore in shades of green

These wispy greens inspired by silver-green flower stems and foggy evergreen forests partner with palettes of clay earth tones, watery blues, and granite neutrals to bring organic hues to the forefront of design.

Need some color palette inspiration? Check out our new 2022 Design Trend Color Palettes to capture these tranquil shades for yourself!

2. Bold Possibilities

After 23 years of choosing colors that would influence product development, fashion, and design, Pantone took an unexpected step this year: the company didn’t choose a color, they created one.

Veri Peri, the 2022 Pantone Color of the Year is a new red-violet color laced heavily with blue. It’s meant to represent the excitement and boldness of the future and “helps us embrace this altered landscape of possibilities, opening us up to a new vision as we rewrite our lives.”

This confident, curious color that stands at the crossroads of color in the digital world and the physical world shines in palettes with bold hues, energetic blues, and moody neutrals.

Need some color palette inspiration? Check out our new 2022 Design Trend Color Palettes to capture these futuristic shades for yourself!

3. A Touch of Nostalgia

Even as color stories begin looking to the future, retro shades from the ’60s and ’70s linger on. Groovy Daffodil, vintage Harbor Blue, and funky Coca Mocha shades paired with soft pastels like Spun Sugar and Gossamer Pink to dominate Pantone’s Spring/ Summer 2022 NYFW Color Palette.

These retro shades reminded us of the famed Jet Era and vintage travel posters, reflected in our 2022 custom color palettes that are now available in Tailwind Create!

4. Bubblegum Pop

Did someone say Y2K? The upbeat colors in Pantone’s Spring/Summer 2022 London Color Palette are the perfect complement to your favorite throwback playlist. Youthful Bubblegum pink, acidic lime Fragile Sprout, and feminine Orchid Bloom are bringing us back in the best ways!

Whether your head is stuck in the clouds, or you’re just an imaginative day dreamer, our Vivid Dreams curated color palettes will make your sparkle shine ✨. 

Try it out now in Tailwind Create!

Patterns, Shapes and Textures

1. Check It Out

‘Check’ yes Juliet to the reinvention of this classic emo/scene style! Checkerboard is not just for your vintage slip-ons – in fact, new life can be found in this timeless classic by reviving it with the playful pop colors and fresh plastic florals currently trending today!

2. Stenciled Blooms

Ever since the cozy, countryside-themed aesthetic we know as “cottagecore” first received its official name on Tumblr in 2018, the doily, wildflower-laden lifestyle has steadily dominated fashion and social media.

In 2022, Cottagecore’s dreamy wildflowers are receiving a vibrant upgrade as florals are reduced to their simplest forms and washed in bold contrasts and vibrant hues!

3. Rounding It Out

Find your future (or simply push past your funk) by rounding out your edges into soft orbs, half-moons, and semi-circles.

In 2022, rigid boxes and angles are being phased out in favor of soft feminine curves in the home, office, community spaces, and more. Round out your own edges for inviting signals of virtual and inner peace!

Use this template in Tailwind Create!

Elements and Motifs

1. Zen – Inspired Lines

Not only do these patterns remind us of Japanese rock gardens and mindfulness, but there’s also an important pop culture phenomenon at play here. With influences from technology and Sci-Fi resurgences (Dune, anyone?) minimal line style with futuristic elements is on the rise.

Source: Society6

2. Matisse Motifs

Organic motifs are out-pacing rigid geometrics in 2022 design, lending an air of freedom, movement, and familiarity to graphics. Matisse inspires one to find their inner peace, as the hallmark organic and balanced shapes create freedom-centered designs. 

Source: Society6

3. Plastic Florals

Trends are all about styles of years past being revived. In 2021, we saw the 90’s come back front and center. These small blocky florals may remind you of that decade, but trust us, that wasn’t their first time around!

Small florals with simple edges actually first saw their rise in the ’60s and 70’s, and seem to continually refresh their image for coming generations.

Photography & Styling

1. Subtle Dimension

Texture is becoming more prevalent in graphic design in 2022, as design programs begin pursuing 3D rendering in everyday graphics. Adobe Capture is making great strides in this area!

2. Natural Shadow

Where light, bright and crisp photo styles once reigned, photo stylings are shifting more towards softer, dimensional shadows and interrupted light to showcase products.

3. Two-Tone Glow

Flat, crisp backdrops are being replaced with luminous gradients in photo and product styling, tantalizing the eye and drawing viewers into the frame.

Source: Studio Zelden

1. Catch Me If You Can

There’s a note of nostalgia in the air, with mod fonts that remind us of the glory days of Pan Am, summer resort vacations, and striped bathing suits. New-old serif fonts like Airplane and Fairview are inspired by the golden age of air travel, while decorative headline fonts with a throwback twist remind us of days gone by. 

2. Styled Geometrics

This 1920’s revival style is the bee’s knees! Art deco-inspired geometric Sans Serifs updated for the modern world will make you fall in ‘green-glass’ love. Daydream in Cuba with fonts like Habana or wander the bygone streets of Miami Beach with Governor for a new take on a timeless classic.

3. Heartfelt Detail

Charming, simplistic fonts that remind us of our favorite small-town cafe are in this year, lending a down-to-earth, cozy feel to branding and design. For a crash course in using organic-feeling scripts and serif fonts like Viktor Script and Futura PT, check out this curated collection from Adobe

4. The Energy of Youth

Oh to be forever young! Design trends are tilting this way with chunky, fat-pen display fonts and zesty handwritten details that will remind you of the days of fuzzy journals and Limited Too shopping trips! 

To get this look, try a big, bold display like Beautiful Freak or cutesy fonts like Adorable or Teashop!

Putting It All Together: Ready-to Use Designs

Itching to use some of these top trending design elements in your next social media posts? Don’t worry, we’ve done the work for you! 

Drawing inspiration from the top trends in design for 2022, we’ve launched four exclusive social media template packs, sixteen curated color palettes, and more right inside Tailwind Create.

Check out each set and prepare to be inspired! 

Jet Set

Inspired by the golden age of air travel in the ’50s and ’60s, Jet Set is chock full of vintage washes, modern lines with a retro twist to wow your followers. 

Check out our brand new vintage travel-poster-inspired color palettes: Secret Island, First Class, South Seas, and Hibiscus Colada, and ready-to-use designs here!

Vivid Dreams

Did someone say the 90’s? Our exclusive Vivid Dreams template pack is inspired by bright pops of color, plastic florals, patch art, and all the things we loved most about Y2K. Warning: this template pack may cause you to hang boy band posters on your office wall. 

Get a sneak peek of our brand new Vivid Dreams color palettes: Dreamhouse, Lip Smackers, Wind Breaker, and Spice World here!

All Organic

Inspired by the soft and simple charms of nature, our All Organic template pack and color palette set is inspired by muted shades, florals, and foliage paired with playful organic shapes!

Get a sneak peek of our dreamy All Organic color palettes: Sedona Sunrise, Fresh Laundry, Meadow Cottage, and Favorite Quilt here!

Look to the Future

Although many trends surging in popularity this year focus on where we’ve been, we’re also collectively thinking – and designing for – where we’re going.

Our Look to the Future template pack is inspired by glowing gradients, sound waves, and the boundless possibilities of the Metaverse. Are you in?

Check out our brand new futuristic color palettes: Neon Sky, Dune, Fiber Optics, and Cyberbike here!

Use Trending Social Media Designs in Tailwind Create

Say bye-bye to boring beige and bland monotonous palettes. And in 2022, let’s start experimenting with bold, energizing colors and designs!  

This new innovative direction is so exciting the Tailwind team wanted to bring our versions to Tailwind Create with curated easy-to-use templates – straight from our designers to you! 
Whether you want to be ahead of the curve and Look to the Future, make your Vivid Dreams a reality, you’re ready to Jet Set to better social media analytics, or you’re feeling pulled to an All Organic approach.

Whatever your design goals are for 2022, Tailwind Create is prepared to take you there!

[sc name=”pin-me-tailwind-create-cta”]

Update your social media designs and stylings with our exhaustive list of 2022 graphic design trends in colors, fonts, styles and more!

Bridging the Gap Between Art and Science with Christine Martell

Growing up Christine wanted to either be a chemist or an artist and her strong love for both art and science began to pull her in two different directions. Christine didn’t think she could have a career doing both, but that’s only because her career didn’t exist anywhere else yet. She was meant to do what no one else had done before.

When Christine looked more into the job of a chemist and discovered how sedentary and monotonous the job was, the path ahead became clear. However, at the time she had no idea her strong right and left brain would work together to bring about her life’s calling. 

That she would one day take her love for artistic expression and use the scientific method of trial and error to create a whole new way of communication and expression. That she would be the first of her kind and pave the way to helping children and individuals learn in a way that makes sense to them, a way that allows them to see it’s okay to learn a different way. That nothing is wrong with us if we can’t fit in a box because we’re all made the way we were supposed to be.

After finishing art school, Christine dove headfirst into entrepreneurship, opening a small shop with some friends and selling homemade jewelry. By dipping her toes into owning a business and selling her art, she learned through trial and error (big left brain energy) how to bring her dreams into reality. And then, she got started.

Christine is highly accomplished, as someone who will always do what it takes and pivot over and over to ground her aspirations. From writing grants for community art projects (which we discuss below) to creating and founding VisualsSpeak, a method of self-expression through collage that engages meaningful connection which is now used around the world. 

Christine Martell is a jack of all trades as she never stops learning and finding new ways to make a difference in both her community and the world. This interview was one of a kind, the type that will warm your heart. Christine is a pioneer, and it’s a privilege to share her story.

Enjoy!

How did your love for art begin?

Christine: I grew up in a family where my grandmother, my mom, and all of my aunts are crafters. I grew up learning how to knit, crochet, draw, and all that stuff. My grandmother had beautiful penmanship. And so, she helped me learn how to write when I was young. There was all this art stuff around me all the time.

VisualSpeaks Case Study 365 days of hearts

Why does that art medium textiles speak to you?

Christine: I think it was innate because I started working with all of the textile mediums when I was young, but I had no idea I could major in it. I was in a class my freshman year, and I was trying to make spider webs because I think spider webs are the most amazing things. I kept trying all these different things, and the professor said to me, “You are a textile major.” And I said, “What’s that?” And he said, “Oh, trust me, I know these things. You’re a textile major.” Then I looked into it, and I had no idea that you could major in something that people in my family did for fun. And I didn’t realize many industries come from that. My connection to textiles is innate.

VisualSpeaks Case Study textile image

As a jack-of-all trades in the art industry, what is your favorite thing to do or make?

Christine: Well, I always go back to the textiles, and the work I’ve been doing most recently is all textile machine embroidery. It incorporates photography, printmaking, and different things like that. Even in my work that I love, I still incorporate multiple media and different kinds of approaches. 

I have this belief that I want to be competent in every media I find, because then when I have an idea, I can execute it. I have this thing about having a broad set of technical skills so that the skills aren’t what’s driving the imagery and the work. This way I can execute any concept and idea in whatever is the most appropriate medium.

Even though I have a degree and I’ve taken lots of courses, I’m still constantly learning. And I  believe I can learn something from everybody. 

I think it’s so important being an older artist to continually learn from younger artists because there’s just so much in different perspectives and life experiences. It just helps keep my viewpoint broad and keeps my curiosity and all those things that are important to drive the artistic vision.

VisualSpeaks Case Study making textiles image

How did you get started teaching art in the community and at schools?

Christine: Other than my art degree I also have a degree in education. I have always loved teaching and it was something I had been doing for a long time about 15 years before I went back and got a degree in it because I wanted to learn more and get better at it. 

I was doing a lot of in the training industry, along with corporate and nonprofits. And then eventually it came around to teaching at the schools. I taught all ages from two-year-olds through seniors. I have a passion for people, it doesn’t matter how old they are, it doesn’t matter what phase they are in. 

I love meeting people where they are and seeing how I can collaborate with them in some way to have a creative experience.

I love doing community based events because you get every age group and you get families together.I love working with multi generational groups because there’s something magical when kids and adults and families work on projects and do things that are creative together. It’s just kind of another little piece of magic that can happen.

VisualSpeaks Case Study kid's engineering activity image

What are some benefits that come with merging art and science like you do when working with kids?

Christine: It’s about helping all students access learning. Oftentimes in schools the learning is geared toward a very particular kind of student. And all these other amazing students might be what they call kinesthetic learners, they learn through their body, they learn through action. And they can fall through the cracks. Then these kids define themselves as not capable, or they’ll say things like they’re not good at stuff.

And actually, I often find that’s not true and they are capable of learning if they are given an avenue to learn through. I find that the arts can reach a lot of kids that get missed in their regular every day kinds of learning. 

When I go into schools and I do residencies, the teachers will say, wow, I never saw that student that way before. And that’s when I feel like I have just really done my job. 

Many people learn a little bit differently. And if you can present a science project or a math project with art, and that art piece grabs the student, then they can easily learn the math and science. All because they are engaged and they’re using something they feel they’re good at rather than something they are bad at.

Many people learn a little bit differently. And if you can present a science project or a math project with art, and that art piece grabs the student, then they can easily learn the math and science. All because they are engaged and they’re using something they feel they’re good at rather than something they are bad at.

VisualSpeaks Case Study Stem project image

Where does the inspiration for the out-of-the-box engineering and STEM activities for school-aged kids come from?

Christine: Well, a lot of times it’s just about problem solving. It’s just taking the method of problem solving and applying the artistic method to that concept. So, it’s taking a strategy and then a method, the methods is how we get to the strategy, and remixing them. 

I do get some ideas from Pinterest and places like that. And I often will make boards on Pinterest for teachers and students to give them ideas and inspiration. It’s like a puzzle that I’m putting together. When I get hired by a school I’ll meet with teachers and all the teachers will tell me what they are teaching while I’m there. 

Then I take their content, whatever project we’re doing, and I put them together. It might be printmaking, and then I will take those printmaking ideas and I will create a project that teaches their content. It’s like a recipe. I have the ingredients and I know that what I’m trying to make, then I just have to come up with the steps that get from where this is to where that is.

Can you explain what VisualsSpeak does, and how it makes art more engaging?

Christine: VisualsSpeak came out of me going back to graduate school when a professor called me into the office and said “You have to stop all this creative stuff. That is not what we do here. All we do is write linear papers.”

It was one of those like, the skies opened, the lightning came down, and I probably turned red because I got so mad. I felt like she was telling me that my reality was no good. I think she noticed how upset I was, and she said, oh, it’s the only thing I know how to grade. And I thought wow, that’s all you know how to do? That’s all you’ve learned through all this advanced education? 


So I decided I was going to do something that helped the world of education, training, and development. I was going to make a bridge to the art world. 

The rest of my graduate program was going to be all about visual communication and learning how to create tools that would open up this pathway so things could be utilized from the art world into the professional world. VisualsSpeak is a tool I developed from that graduate program. Originally it was a set of 200 photographs used to deepen conversation. And now it’s used across the world in all sorts of different kinds of learning, training, therapy, and coaching. 

Basically, you are asking somebody a question, or a group of people a question. It could be, what do you want to happen in the next five years. And then they select photographs, and they assemble them like a collage. Then they talk about the photographs and it totally changes the nature of the engagement because it’s activating different channels in the brain. One is verbal, one is visual. And if you access a concept through the visual side first and then talk, it’s totally different than if you go through the verbal side.

Instead of people telling me the stories they already know, which is what happens when you say, who are you. You’ll give your name, rank, and serial number. But if I ask who you are and I have you assemble photos, you’ll tell me about your beliefs, values, assumptions, and give a really deep story. 

It accesses the ability to tell really meaningful stories, and then when people tell meaningful stories to each other, magic happens. Teams work better, people engage with their companies differently. It changes a lot of different things. And now I have other products like icebreaker sets and things like that for both individuals and groups. 

It’s basically about changing communication to create a ripple. I like to design something that then goes out in the world and has action beyond me. 

Now I have thousands of people around the world who use these tools, and they are out making a difference in people’s lives every day, and that really thrills me.

VisualSpeaks ice breaker kits image

How did you first discover that when people put collages together that it created deep and meaingful communication and connection?

Christine: Well, I had some indication because I’d been teaching people to make collages, and I noticed that my students would talk about what they were doing using deep stories. And so I thought, oh, there’s something there with that.

Then I developed a testing method. I was in graduate school, and I had access to all these professors and people who knew how to do structured testing. And so I started by laminating 10,000 photographs from books and magazines, then I put them into 98 categories. 

Then I had hundreds of people go through this process with me. And basically, I just asked them to make these collages. And then I didn’t even engage with them, I just asked them to do it and tell me stories while I took notes. 

Eventually, I learned how to optimize their experience. I learned what worked best. And then once I did that, I understood the quality of the photographs because that makes a big difference. And then I spent a year photographing with a business partner and a couple other photographers. And we found the images that work the best and then created the project and tools. It was a long process, it took me two years to do it. 

With such a wide range of projects and jobs, what has been your favorite you’ve done, whether individually, in the community, or at a school?

Christine: I did this piece probably five years ago, it was called For Everyone. And it was on the side of the library about diversity and inclusion. It’s a printmaking project that we blew up to 80 feet long. Then I asked the community to come and sign on the sections of it in their native languages.It says “for everyone” in the 16 languages that are spoken in our city. 

There’s something about diversity and inclusion being celebrated. That has been one of the pieces that has touched me the most and it’s still up. There’s just so much about it, so many layers to it. 

I wrote a grant to do the project. And I got to use this cool, it’s like vinyl, but it’s like a sticker on the building. So I didn’t paint it on, I stuck it on the building. And it’s removable which is super cool. 

So it showed me a material that enables us to do temporary installations on outdoor walls and there’s even a version that you can drive on so you can do it on  pavement. So I discovered this cool new technique. There was a lot of learning, a lot of people involved in it, and it was just a great project.

As someone who is carving out their own career and following your passion, what advice would you give to someone wanting to leave a 9-5 and follow their own passion?

Christine: You have to be realistic that you’re not going to go off and just be an artist, you are starting a business and you have to have business skills. I think many people are surprised at how much time we spend marketing, doing all of this other stuff, and how much isn’t about making art. 

It’s not unusual to spend 50% of your time marketing. But also you have to have the skills to run a business, you’ve got to have a business structure, you have to have a separate bank account. 

And then the more skills you have in all of this other stuff, the better off you’ll be. Can you build a website? That takes a whole other set of skills. Can you create graphics? Do you have some simple graphic design skills? 

The more media skills you have, the more technical skills you have on the computer particularly, the easier it’s going to be for you to run your business. There’s this idea that you get discovered and everything works out. But it doesn’t for most people, there’s a few gifted people who that happens for, it’s just like in the music industry. 

When you think about all the people you know that play music and how few of them are making bazillions of dollars, the same thing happens in the art world. Of course, we see the people that are making the bazillions of dollars all the time. And it’s not like that for everybody. 

You can make a living as an artist. I’ve made my living as an artist my whole career. You just have to be realistic about what being an artist is, it’s about being a creative entrepreneur. 

You need the entrepreneurial and creative skills to make it come together and replace an income. And remember you have to pay for your health insurance, your social security, you have to make sure that you are keeping back 20 – 30% of everything you make for taxes because that can get you at the end of the year. 

You have to be willing to spend money on things like accountants and lawyers. It’s about going in with your eyes open. I never say don’t do it. But I do think it’s very helpful if you already know how to make money from whatever it is you’re doing before you jump off the cliff. Because I see very talented people who have beautiful art decide they’re going to become artists and they don’t learn how to sell the art before they take the jump.

It’s a mindset piece about knowing that your work is worth it, as well as constantly changing methods for how to sell. It’s just like social media, it’s always shifting, Nothing is the same as it used to be with people engaging with the world differently since the pandemic. We’re all kind of redefining together.

VisualSpeaks Case Study textile print image

Why did you decide to start using Tailwind?

Christine: I love Tailwind because I can batch work. Marketing can take up 50% of your time, who wants to spend that much time? When I’m in my creative space, I guard my creative time. I like to immerse. I like to spend hours and just really get in the zone and Tailwind enables me to not have to think about Instagram, Facebook, or Pinterest every day. I can get into a headspace where I can set everything up and let it go. 

That was initially why I started using Tailwind. 

Tailwind has gone through a lot of iterations since I’ve had an account and it just keeps getting better and better. It keeps giving me more tools to spend less time which is fantastic. I feel like they understand how difficult it is for small businesses to have to do all the stuff. And so, the product keeps changing in ways that serve me better and better.

What has been your favorite feature on Tailwind?

Christine: Scheduling. But some of the new stuff is cool too. Being able to do some of the graphics in Tailwind is awesome! It saves so much time. Now that you can integrate more accounts, that’s fantastic too because I’ve had multiple accounts in the past. And now you can see the whole picture better with this latest update which is helpful because it’s so easy to get scattered as a creative entrepreneur. Especially one that is doing a lot of different projects.

You are creating tools that help our accounts look more professional. 

And lastly, what’s next for you and your career?

Christine: Right now, I’m working on taking my surface pattern designs and pitching them to companies. I’m looking for licensing partners and stuff for that work I’m doing. And then after that, I want to get more into teaching again. I miss teaching. I want to get more online classes and things like that going.

I’m mainly just trying to decide what to teach. Because once again, I do so many things, so that’s what I’m trying to figure out.

Where you can find Christine and VisualSpeak

Were you as wowed as me?

Want to see what Christine is up to? Check out her website, Facebook, Instagram, Pinterest, and LinkedIn.

And if you want to learn more about VisualsSpeak, you can visit it’s website and see what products and services are offered. And don’t forget to check out Christine’s About page to see all of her incredible accomplishments!

Until next time, friends!

Christine wanted to change the way educators taught by bringing art into math and science. Come read how she crafted her career to do just that!